

HOW TO WRAP (& ELEVATE) TULIPS
FOCUSSING ON SEASONAL FLOWERS
INTRODUCTION
How to wrap tulips in under a minute. All the steps to help you wrap your own tulips. You simply need HESSIAN (inexpensively, cut from large rolls from haberdasheries), SCISSORS (for both the tulip stems and hessian) and CORD or RIBBON to secure the wrapped hessian.
NOTE … condition the tulips and allow to rest for several hours in water, so they are fully hydrated before you wrap them. The stems will be exposed after you have wrapped them, so they can be easily placed back into a small amount of water again, before they are given to your customer/recipient.


step-by-step image guide

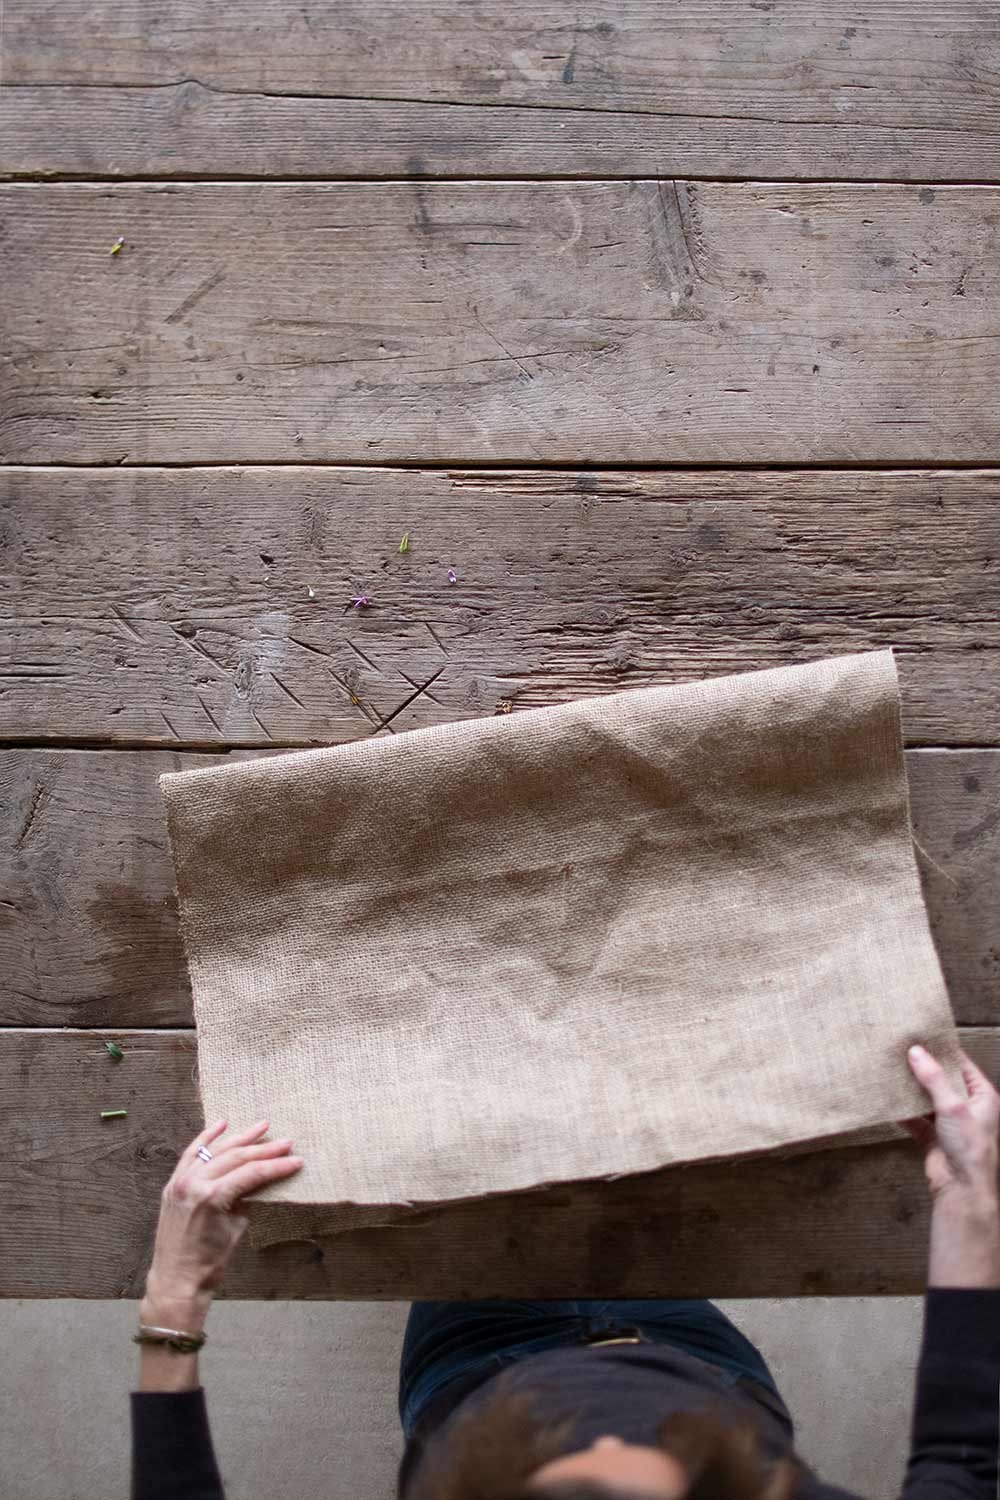
1. HESSIAN RECTANGLE
From a large hessian roll, cut out a rectangle section, measuring approx. 75cm x 50cm.
2. FOLD HESSIAN
Fold your hessian in half, along the longer length. By doubling the thickness of the fabric, the final wrap will give your tulips stems more support (I find that the hessian is a little too flimsy if used as a single layer).

3. create wrap shape
Place the smaller rectangle shape in front of you, longer lengths running left to right. Fold top right corner just short of the middle.
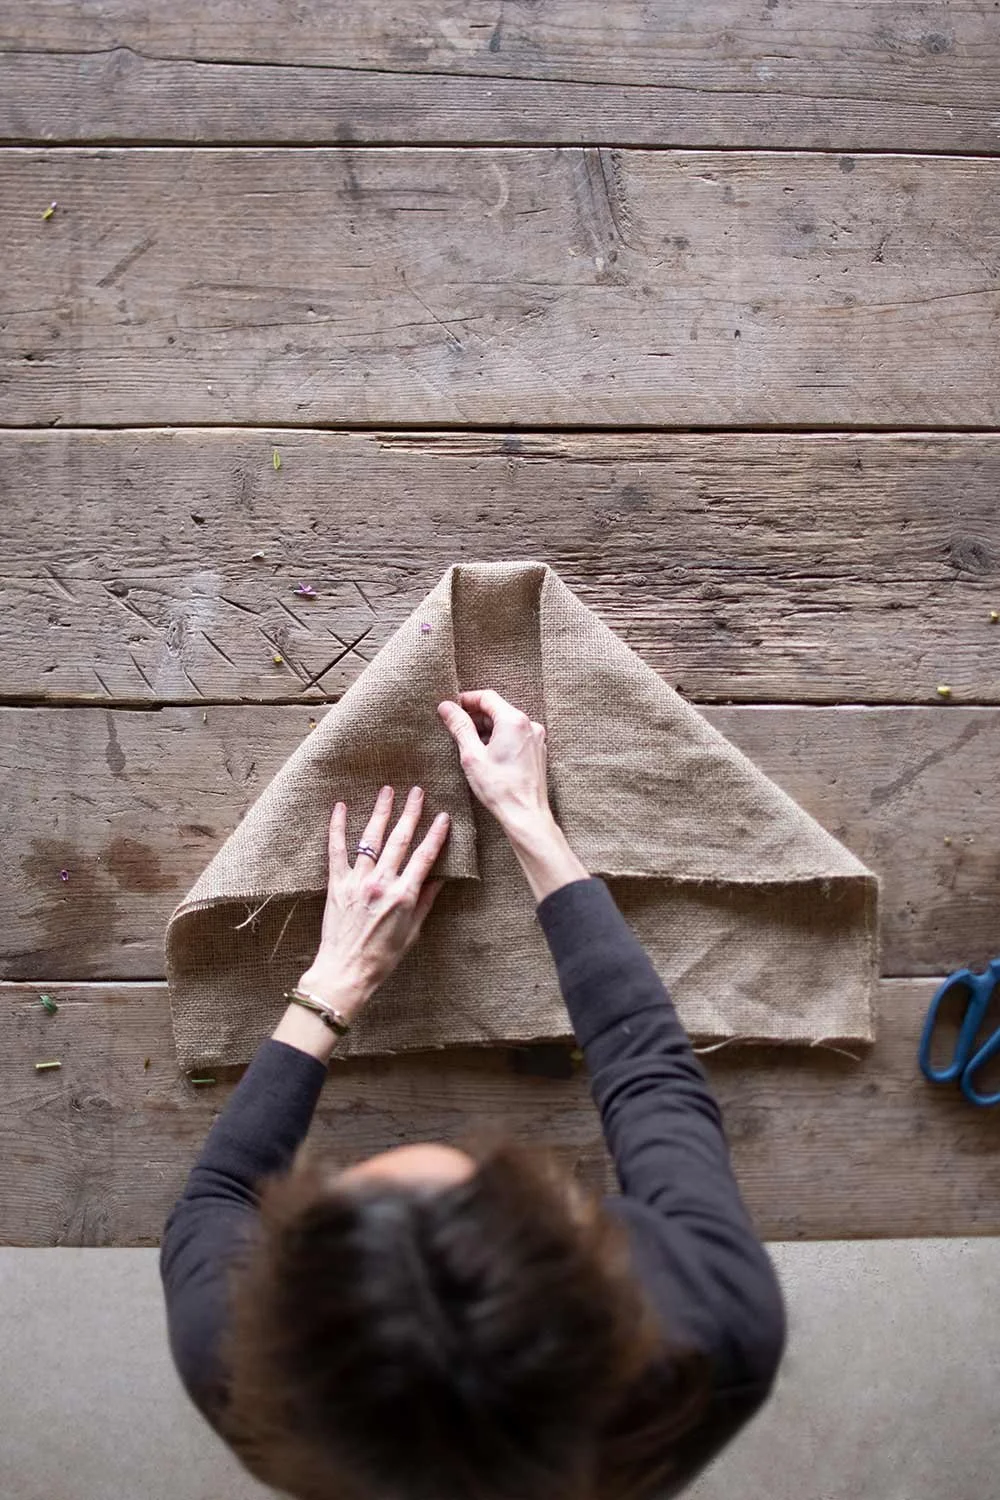
4. REPEAT FOLD
Repeat with top left corner; leaving a section of approx. 10cm unfolded in the centre.

5. PREPARE TULIP stemS
I love to keep most of the tulips leaves, simply removing the more tattered, outer, gnarly ones. This also helps to ensure the final wrap isn’t overly bulky, and the main focus on the flowers themselves.
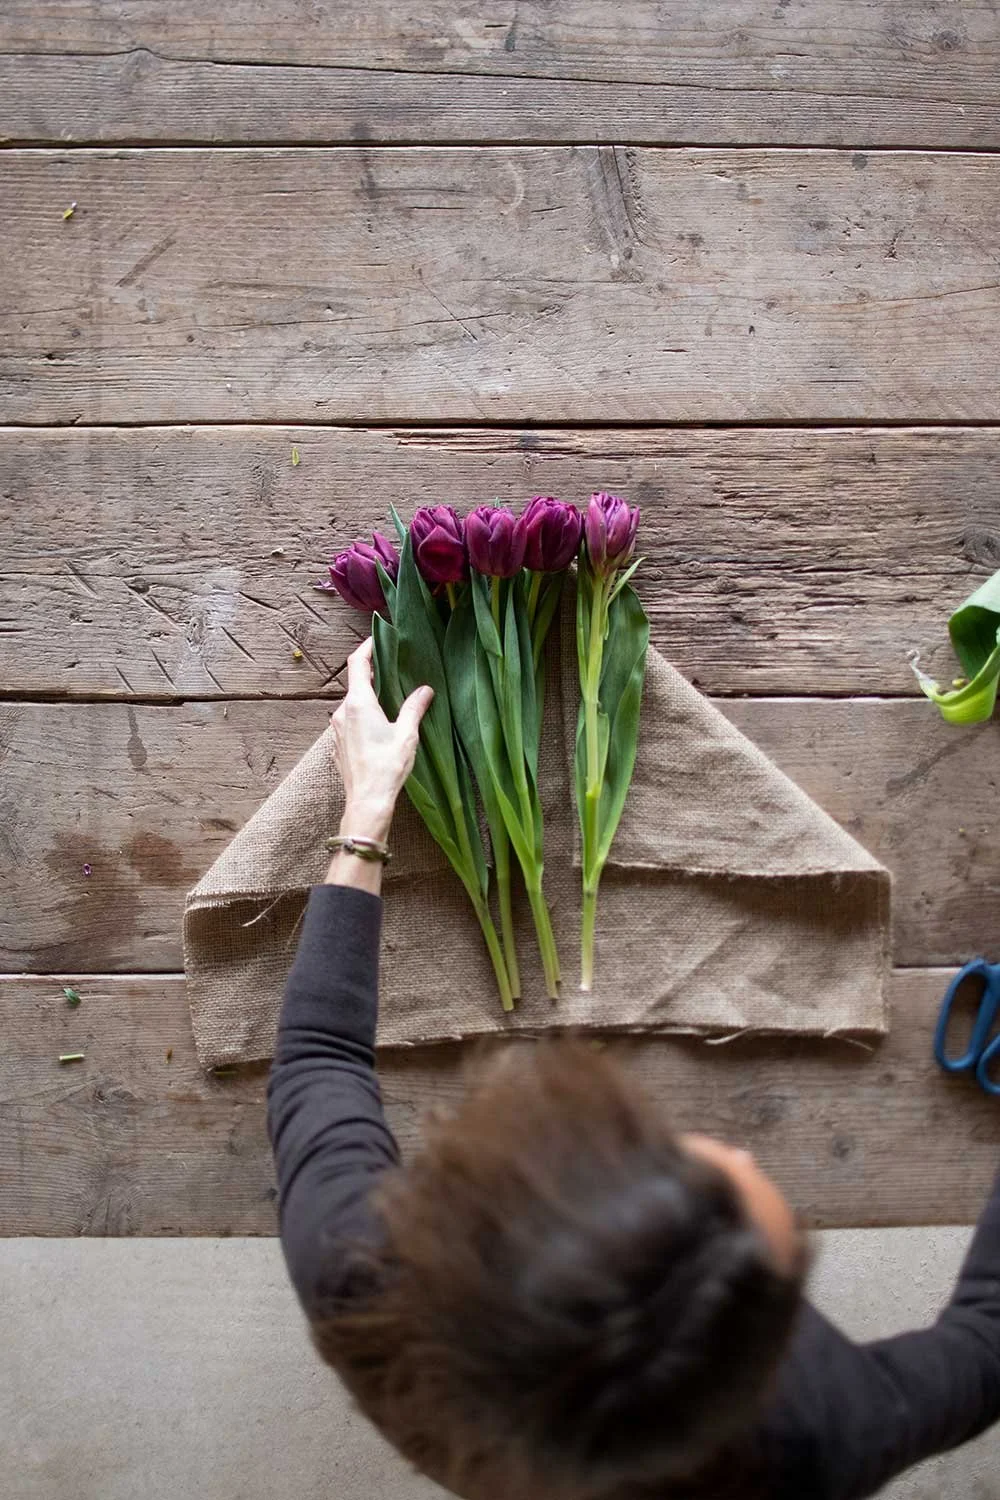
6. FIRST LAYER
Place one row of tulips (here I have placed five initial stems) onto the hessian, positioned with the flower heads just clear of the top of the hessian.
NOTE … you can see the back of the wrap, to see how much of the flower head is left exposed, further down the page.
7. SECOND LAYER
Layer a second row of tulip stems, on top of the first, base layer. Place this second row just a little lower than the first.
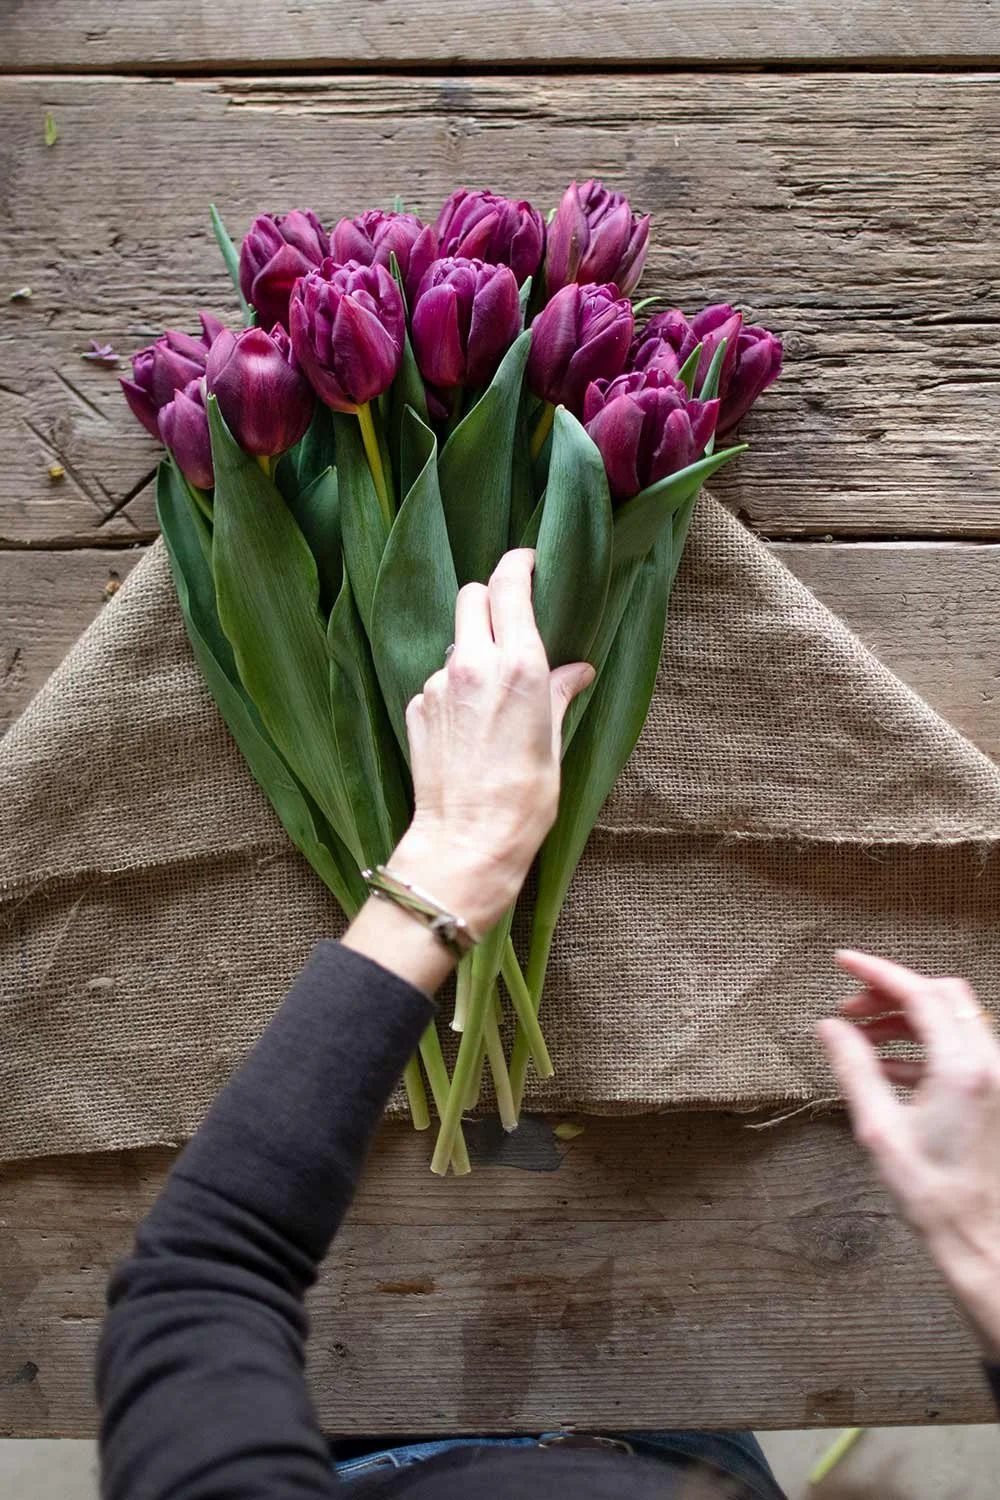
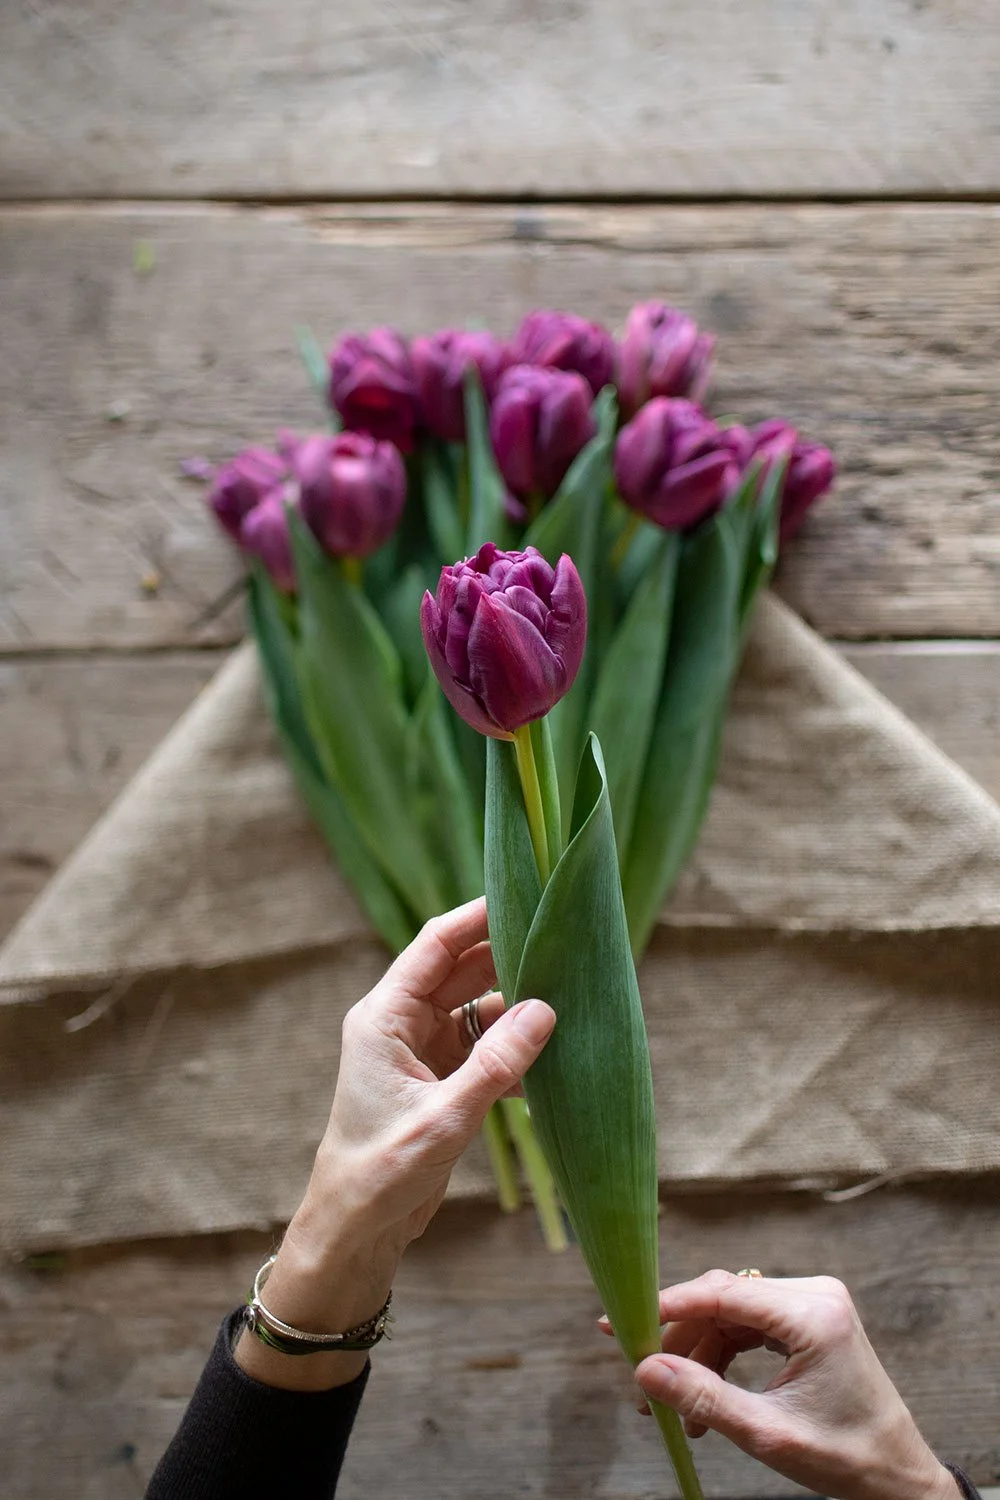
8. NEAT, fan-SHAPED DISPLAY
You are forming a neat fan-shaped display, with each flower head clearly visible, yet neatly brought and layered together.
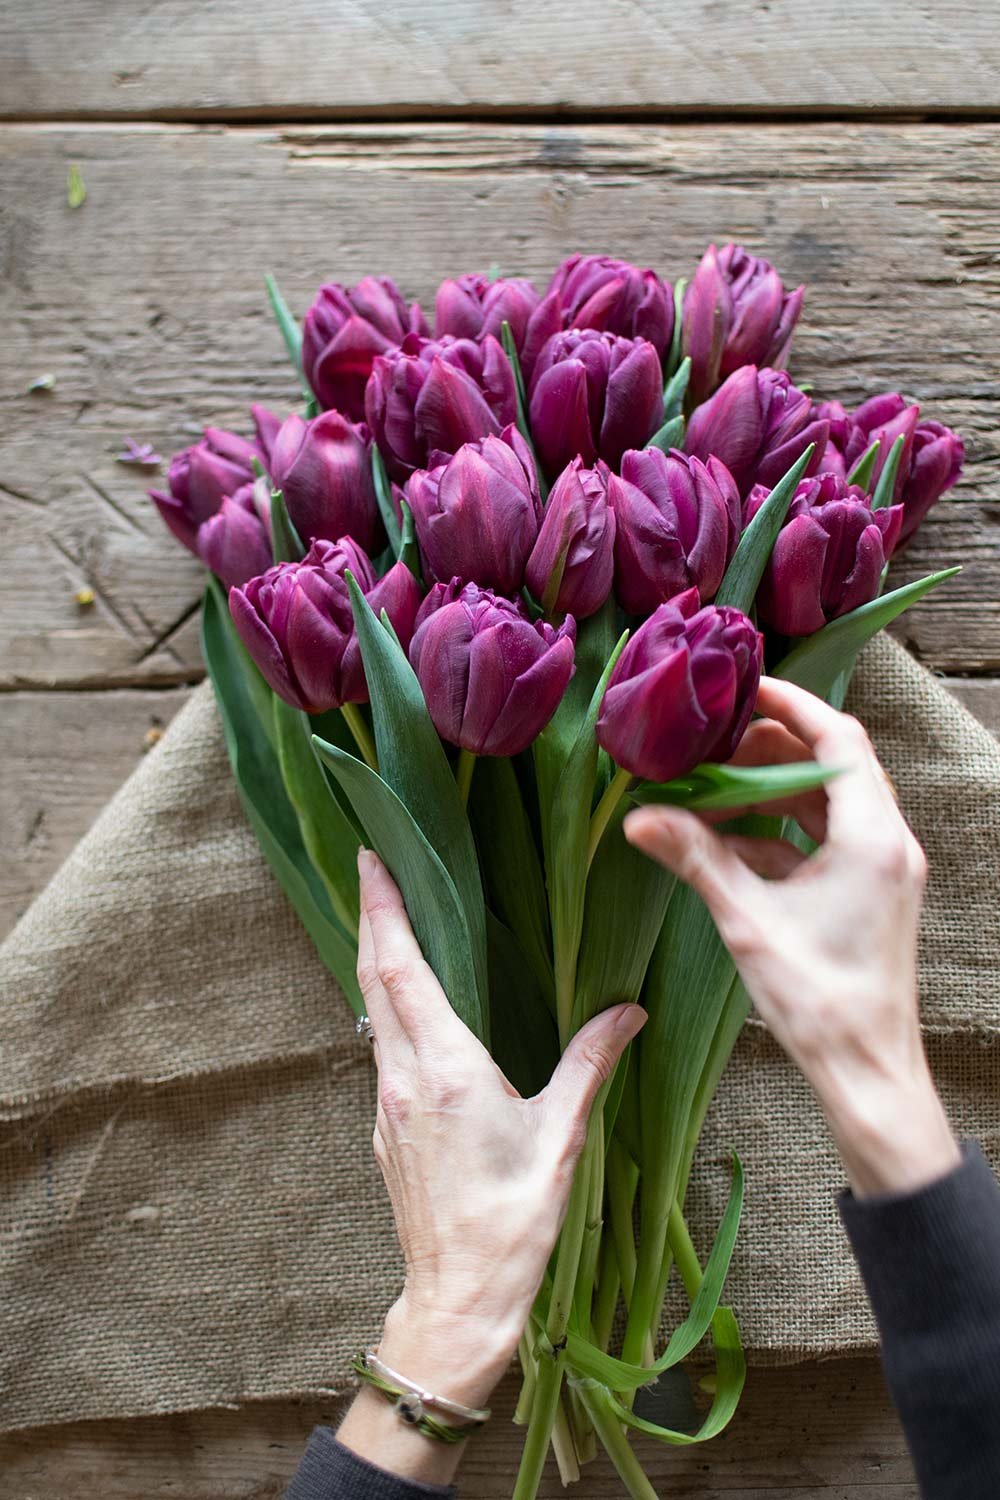
9. THIRD & FOURTH LAYERS
Continue gentle placing and layering, finishing with two to three final stems on the top, final layer.

10. WRAP HESSIAN
Taking one side of the hessian, pull it firmly over the tulip stems …
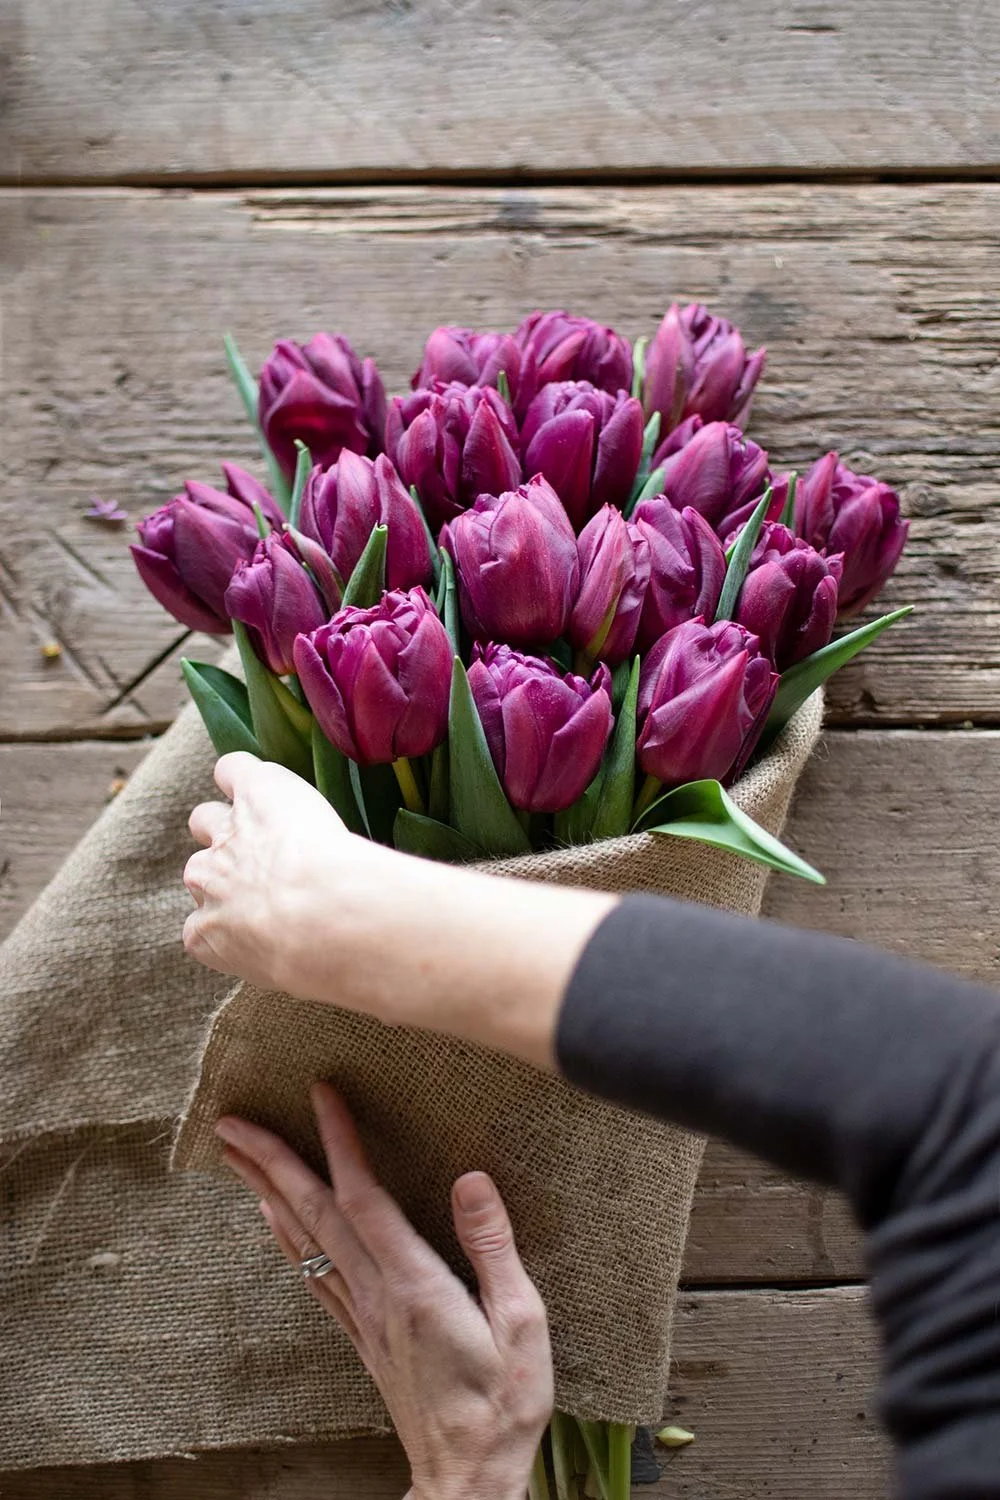
11. TUCK HESSIAN
… and tuck neatly under the stems.
12. FINISH FIRST FOLD
… to create your first, neat hessian fold.

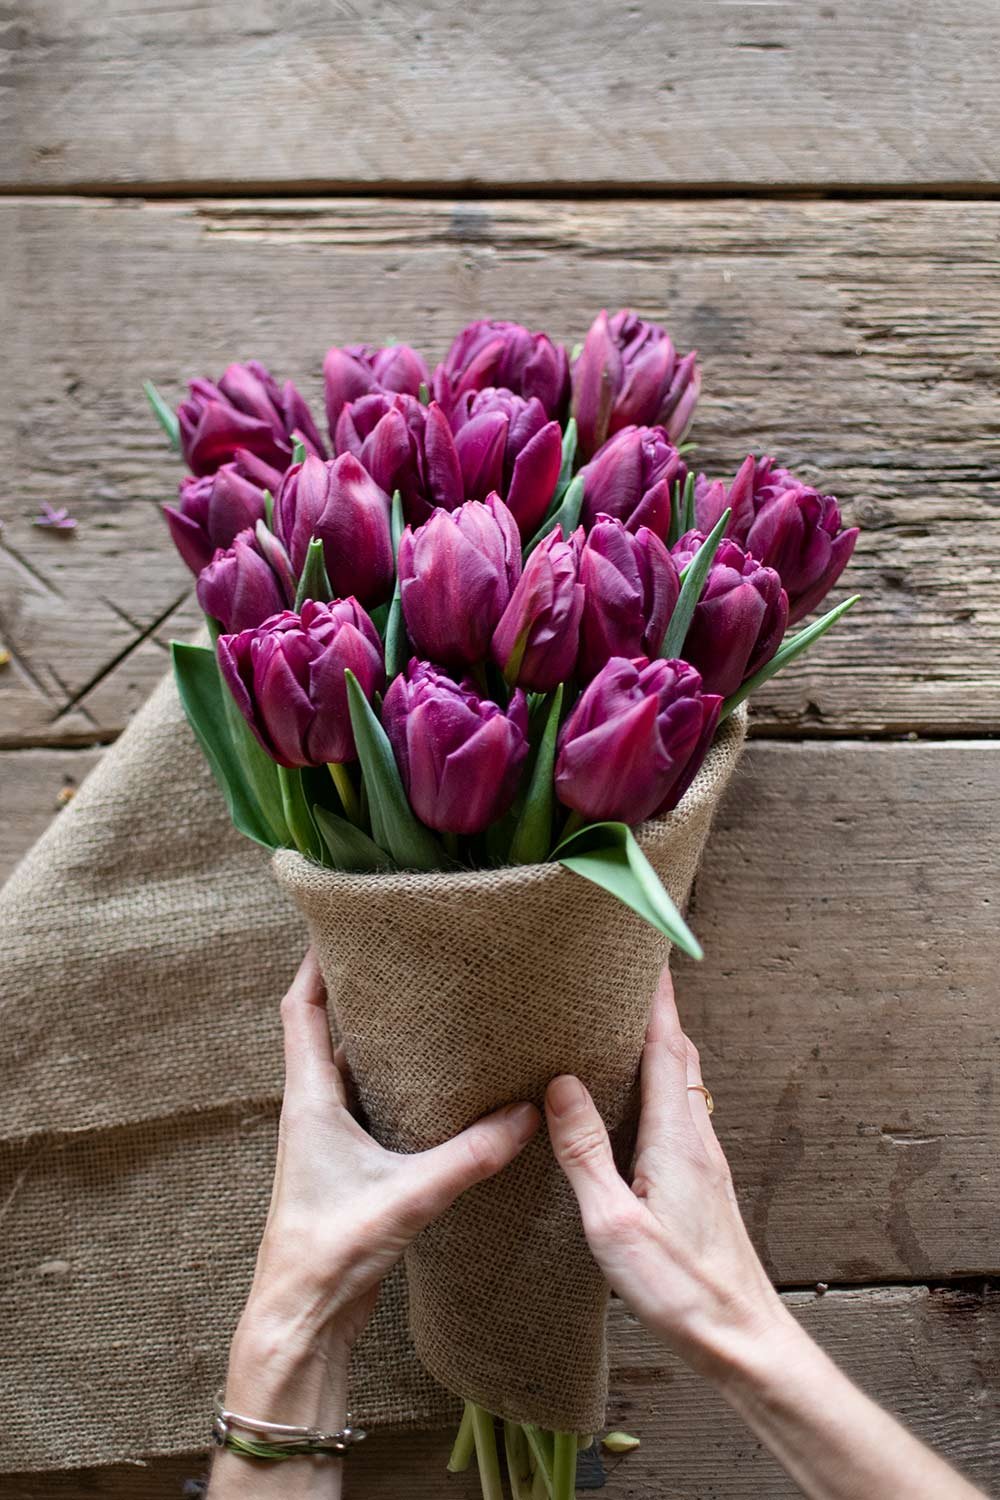
13. SECOND FOLD
Pull the second side over, holding the first in place, to ensure the hessian remains firm and tight.

14. NEAT FINISHED EDGE
Fold over the second edge of the hessian, to create a neat finish.

15. COMPLETE THE WRAP
And pull tight, to complete the wrap.

16. RIBBON OR HESSIan CORD
Select a long length of ribbon or hessian cord, and place it underneath the wrap.
I have used a hessian cord, focussing on a natural/organic finish; you may though prefer to finish with elaborate and/or complementary coloured bow.
TIP …. you can source ribbons and cords from a huge number of independent suppliers via Etsy.

17. TIE RIBBON/
HESSIAN CORD
Tie a single knot, to hold the hessian wrap in place.

18. FINISHED BOW
Finish with a secure and neat bow, with the ribbon ends approximately the same length as the tulip stems.

19. STURDY SUPPORT
Check the stems are fully supported.
The hessian wrap looks great with the flower heads still exposed and at the same time, it provides a sturdy support for the delicate stems.
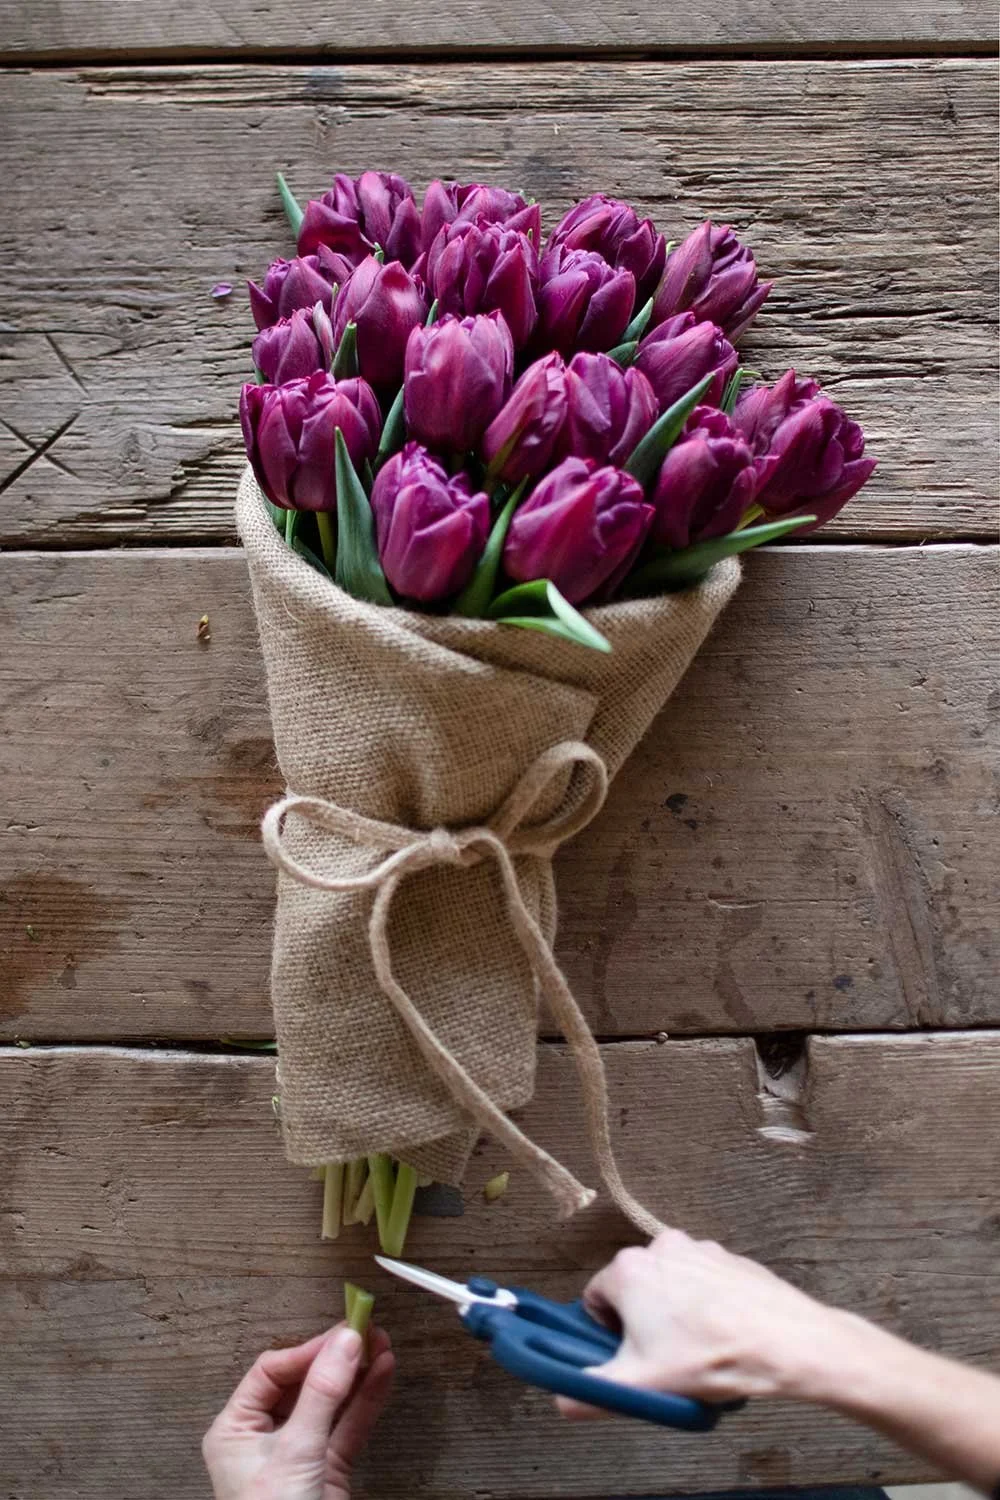
20. NEAT STEMS
Trim any slightly longer stems, so they neatly line up.
TIP … unlike other stems - where it’s best to cut them on an angle (which increases the surface area and in turn, water absorption) - cut the tulip stems straight across. The stems are soft, and are less likely to bruise/damage on the base of the vase. if they have a sturdy, straight cut.
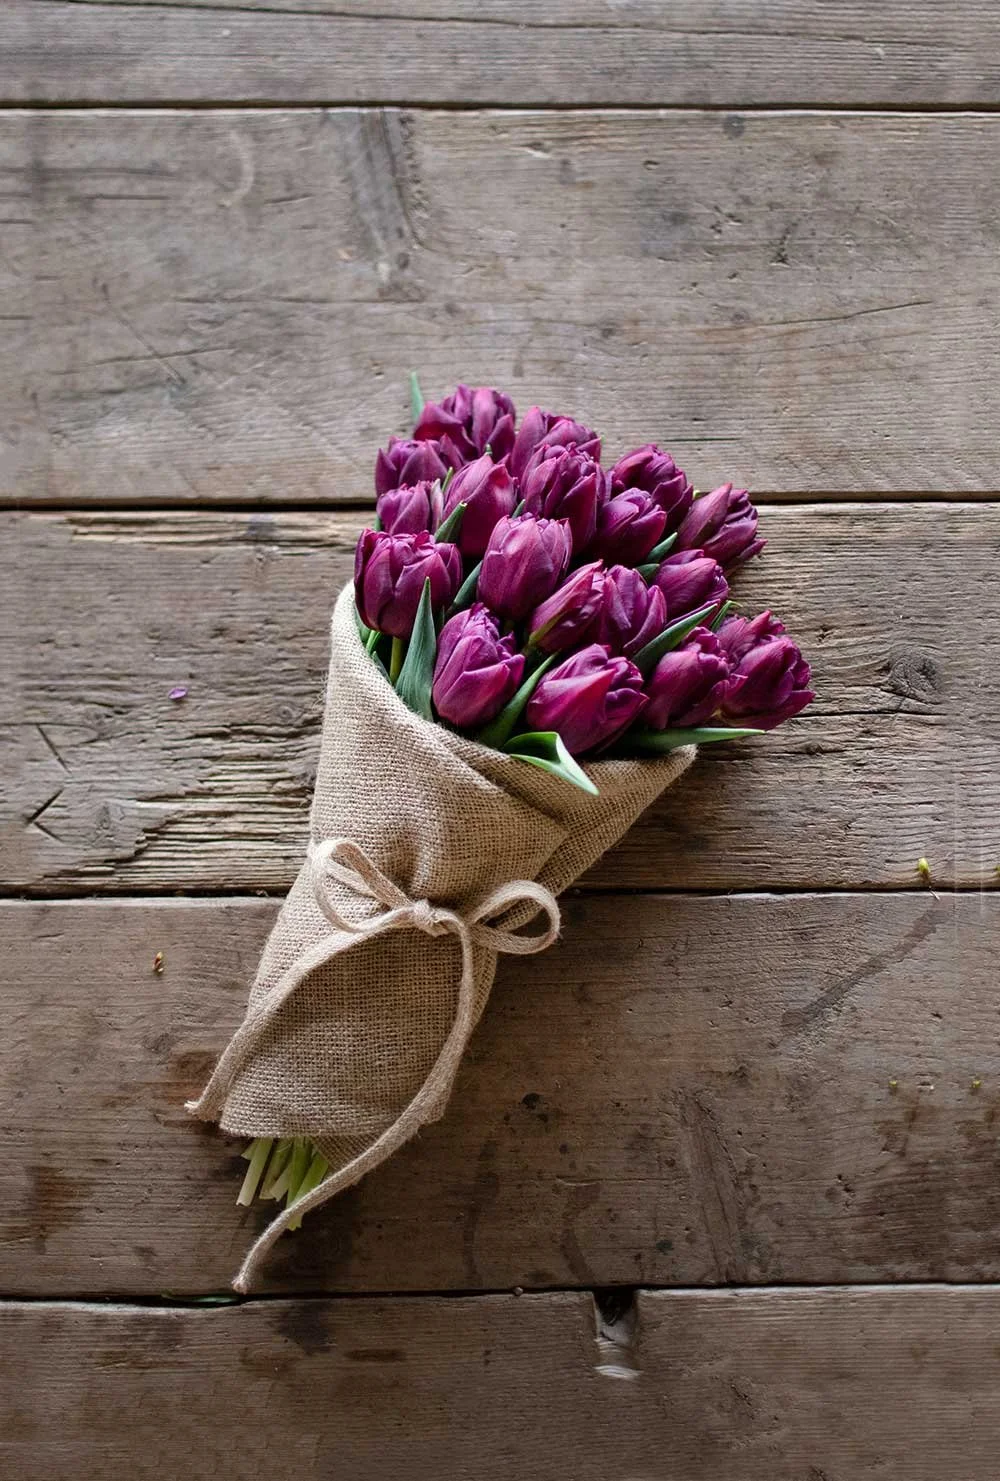
FINISHED WRAP
Your wrapped tulips are ready to hand over to your customer/recipient. The finished wrap feels reassuringly snug and supported, and despite the simplicity in the materials used, it feels really luxurious and very much worthy of an incredibly special Valentine’s Day bunch … or simply a bunch to show how much you care.
TIP … as the end of the stems are exposed, they can easily be placed back into shallow water, before they are given to your customer/recipient.
MORE IN THE JOURNAL

HOW TO BOOST HELLEBORE LONGEVITY
CARE GUIDE & EXPERT TIPE

WINTER TABLE DESIGN
COMPOTE BOWL & KENZAN