
FOREST INSPIRED AUTUMN/FALL DESIGN
INTRODUCTION
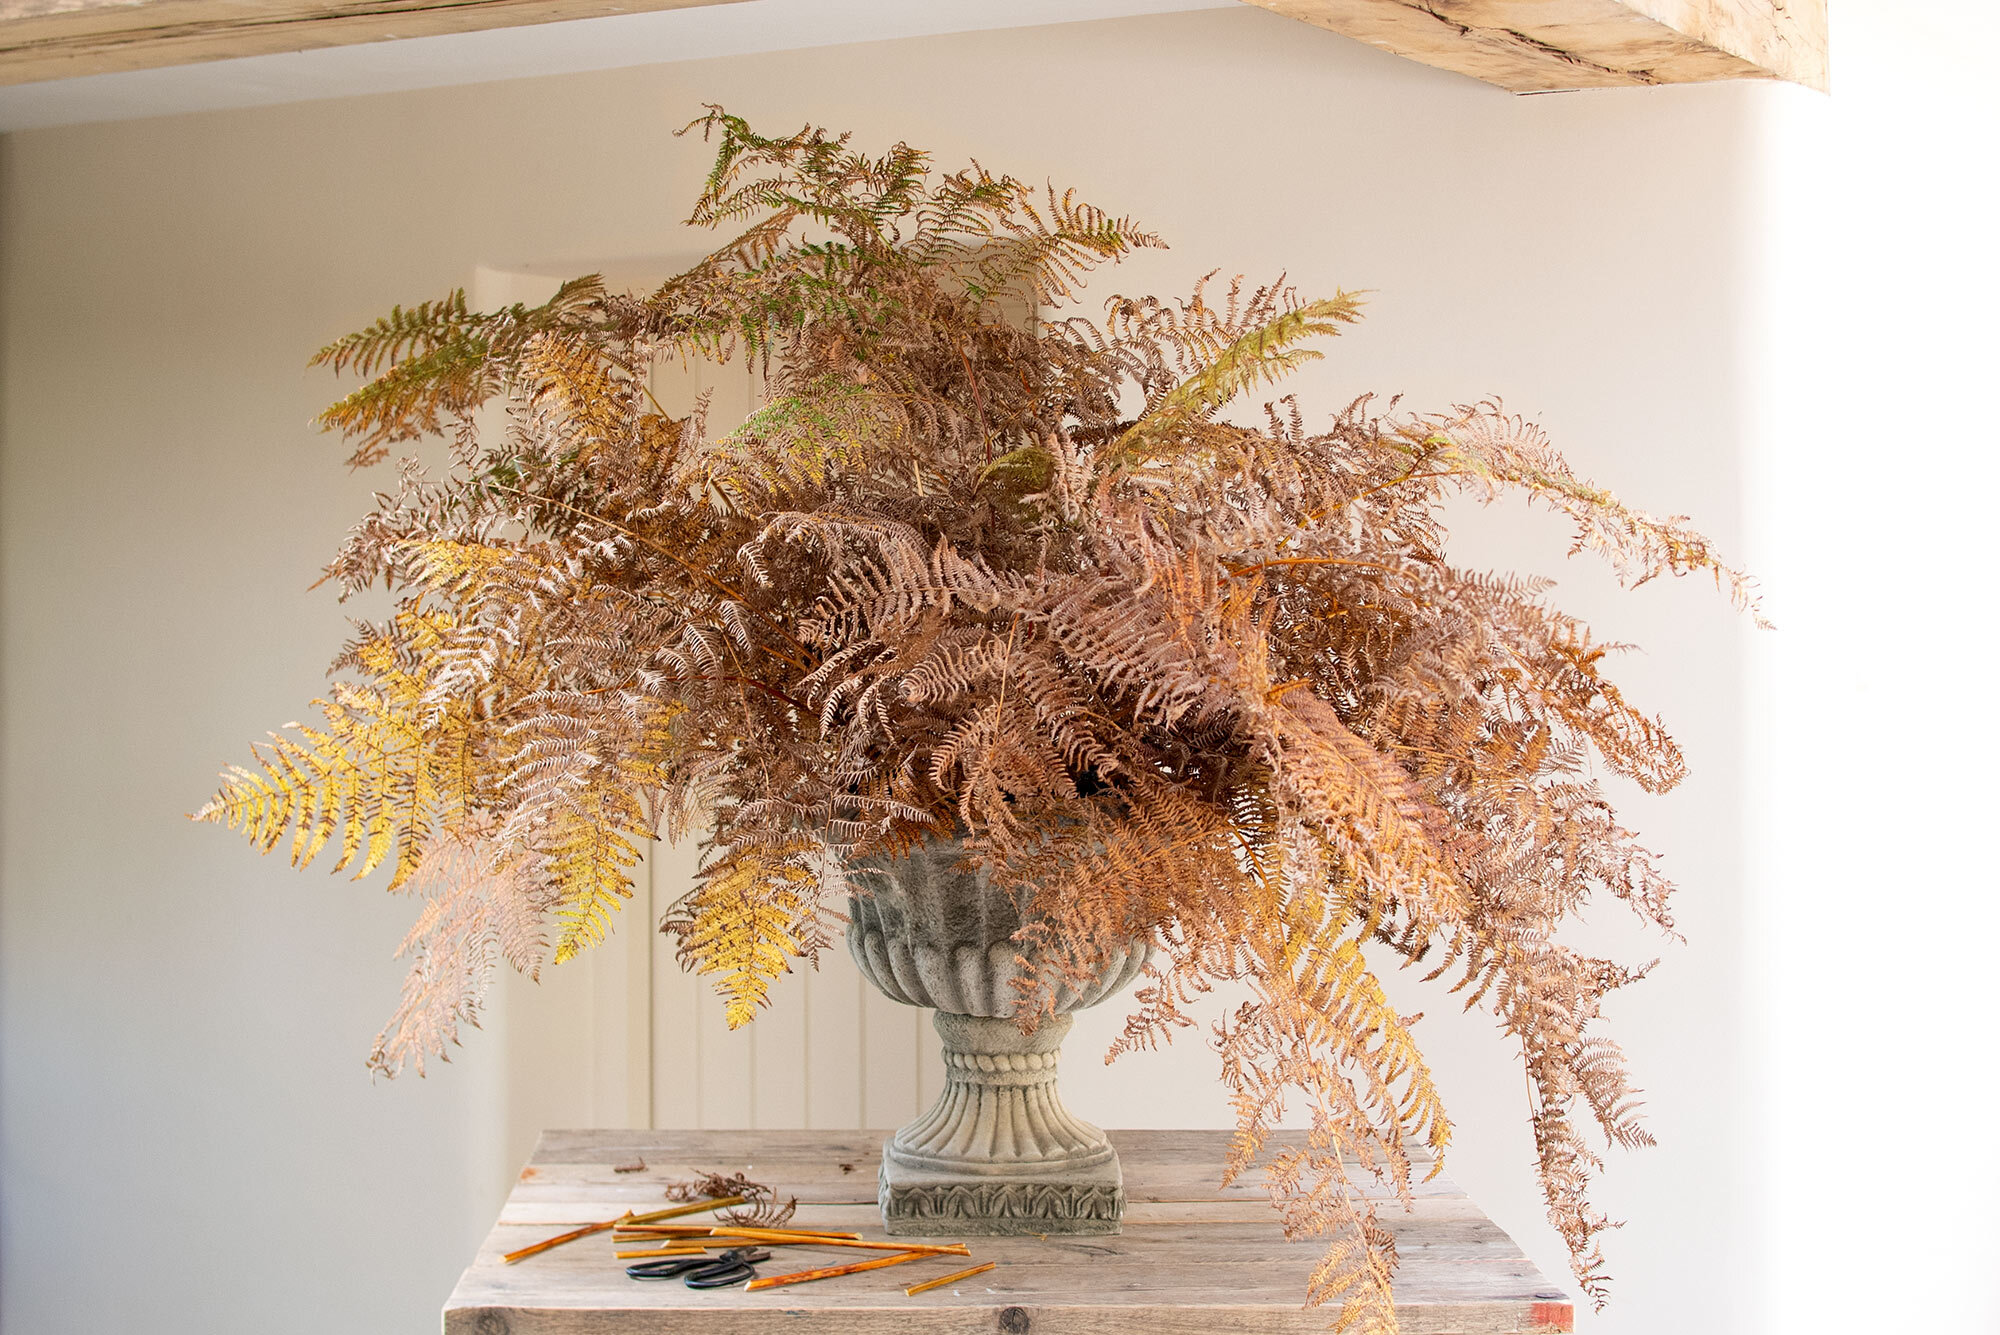
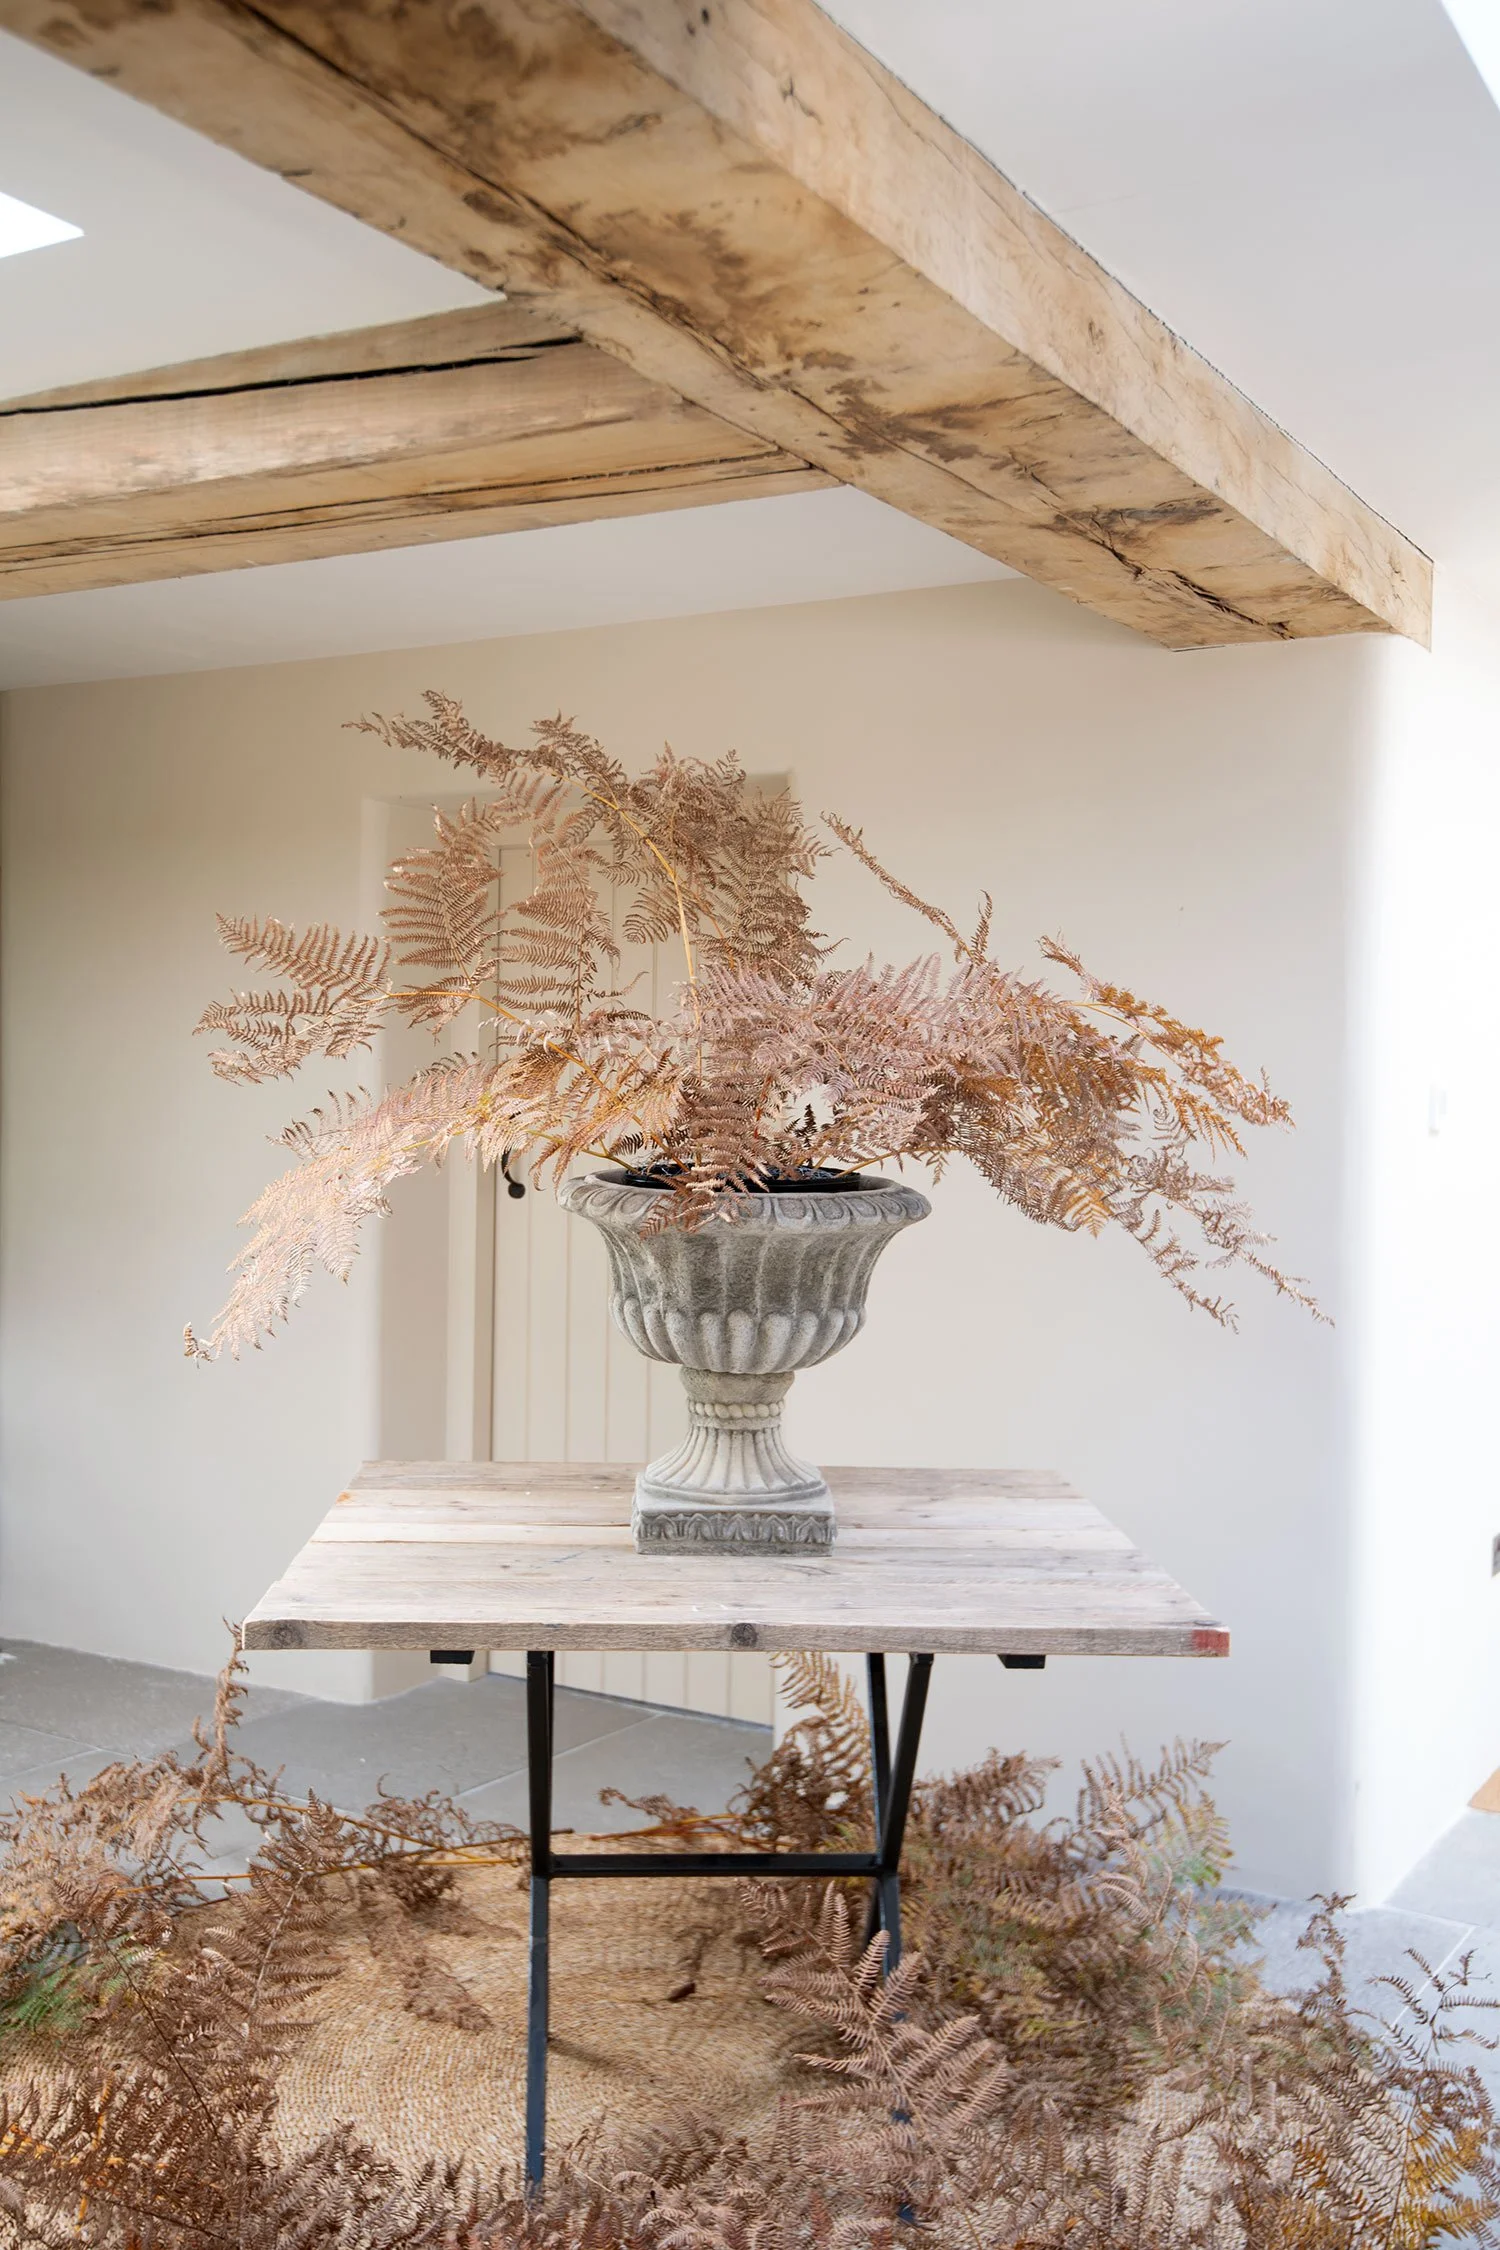
Inspired by the light, feel and flora of the autumn forest floor - using a series of different shapes and lengths of bronzed bracken, I created a large autumnal arrangement. It is delicate and light, with deep layering and a gentle warmth. Below is a list of ingredients and tools, and a series of four steps, to guide you through the full making of the design. I hope it’s helpful and inspires your own large autumnal design.
Much love,
Philippa x
LANDSCAPE & INSPIRATION
We are very lucky to live close to the most beautiful forest, which from spring through to summer is filled with a mass of bracken, filling the forest floor. As autumn arrives, the bracken, in all its wonderful shapes and long lengths, begins to bronze and the forest takes on a completely new feel. Walking through the forest during the autumn, as the low light streams through the forest canopy and onto the floor, the bronzed fronds come to life in a rich, warm glow.


MATERIAL
After the bracken has bronzed, shortly afterwards it begins to wilt and decomposes, returning to the earth and to feed new growth the following season. Once the bracken has fully bronzed and before it starts to wilt, this is the perfect time to collect just a few stems for your designs. Be careful to only take a few stem and never leave any trace either from the plant itself or the route to and from plant. If you are foraging, please remember there are different laws in different countries - always know your own foraging laws before foraging.
tools & ingredients
Large vessel (I used a faux stone urn from a local garden centre
Internal bucket (to fit snugly inside the vessel)
Chicken wire (approx. 1m2)
Floristry scissors (the ones I use are made by Japanese Co. Sakagen)
Approx, 20 stems of bronzed bracken (or alternative large seasonal foliage)

STEP-by-step to create the design

STEP ONE
PLACE A LARGE WEIGHT into the base of an internal bucket - the internal bucket should fit snuggly into your vessel/urn - you won't be using water for the bracken, so this extra weight ensures the design is stable and doesn't topple.
Add a few large folded sections of chicken wire into the internal bucket (three layers will be ample). The chicken wire will support and fully hold the stems.
Place the internal bucket into your larger vessel/urn, ready for the bracken.
STEP TWO
KEEP THE LENGTHS of the bracken long. Add your first three stems, positioning carefully to create the initial shape of the overall design.
Spend time working out the first three placements, as these stems will help to create your final shape.

STEP THREE
CONTINUE FOCUSSING on the shape, adding extra lengths of bracken to elongate the design.
If the design is to be placed against a wall, keep the back flat, simply focussing on the front and sides. And if the design is to be placed on a central table, ensure the design looks good from all angles.
Step back frequently, looking at the design from a distance, this helps ensure you create an even shape (it can be difficult to fully see the shape when you remain close).

STEP FOUR
FILL THE LARGER GAPS, maintaining the initial shape and add shorter lengths underneath and around the base, to blend the edge of the vessel with the design.
Follow the care guide below, to enjoy your design for a few weeks.


HOW TO CARE FOR YOUR DESIGN
The design uses dried bracken - if placed in a warm, dry environment and treated with care, it will last several weeks. As the arrangement dries further, the fronds will become brittle and will break if touched and/or brushed passed. If you treat your design with care, you will be able to enjoy it for a much longer period than when the stems are green and fresh; one of the benefits of naturally dried stems (and autumn!).

