

CLASSIC APOTHECARY VASE
STEP-BY-STEP VISUAL GUIDE
An apothecary vase filled with a mass of seasonal foliage and a few flowers, is one of my all time favourite designs. It’s a brilliantly quick, impactful design for larger spaces at home and for informal events. It’s a classic Floristry Fundamentals design, and once you have mastered the steps, you’ll be able to quickly and easily create impactful designs, simply using available seasonal ingredients.
Here I share a full step by step guide, from conditioning to creating, to aftercare. I hope it proves helpful and inspires a mass of wild, loose and perfectly carefree designs … I find that these are always the most satisfying to make and to enjoy afterwards.
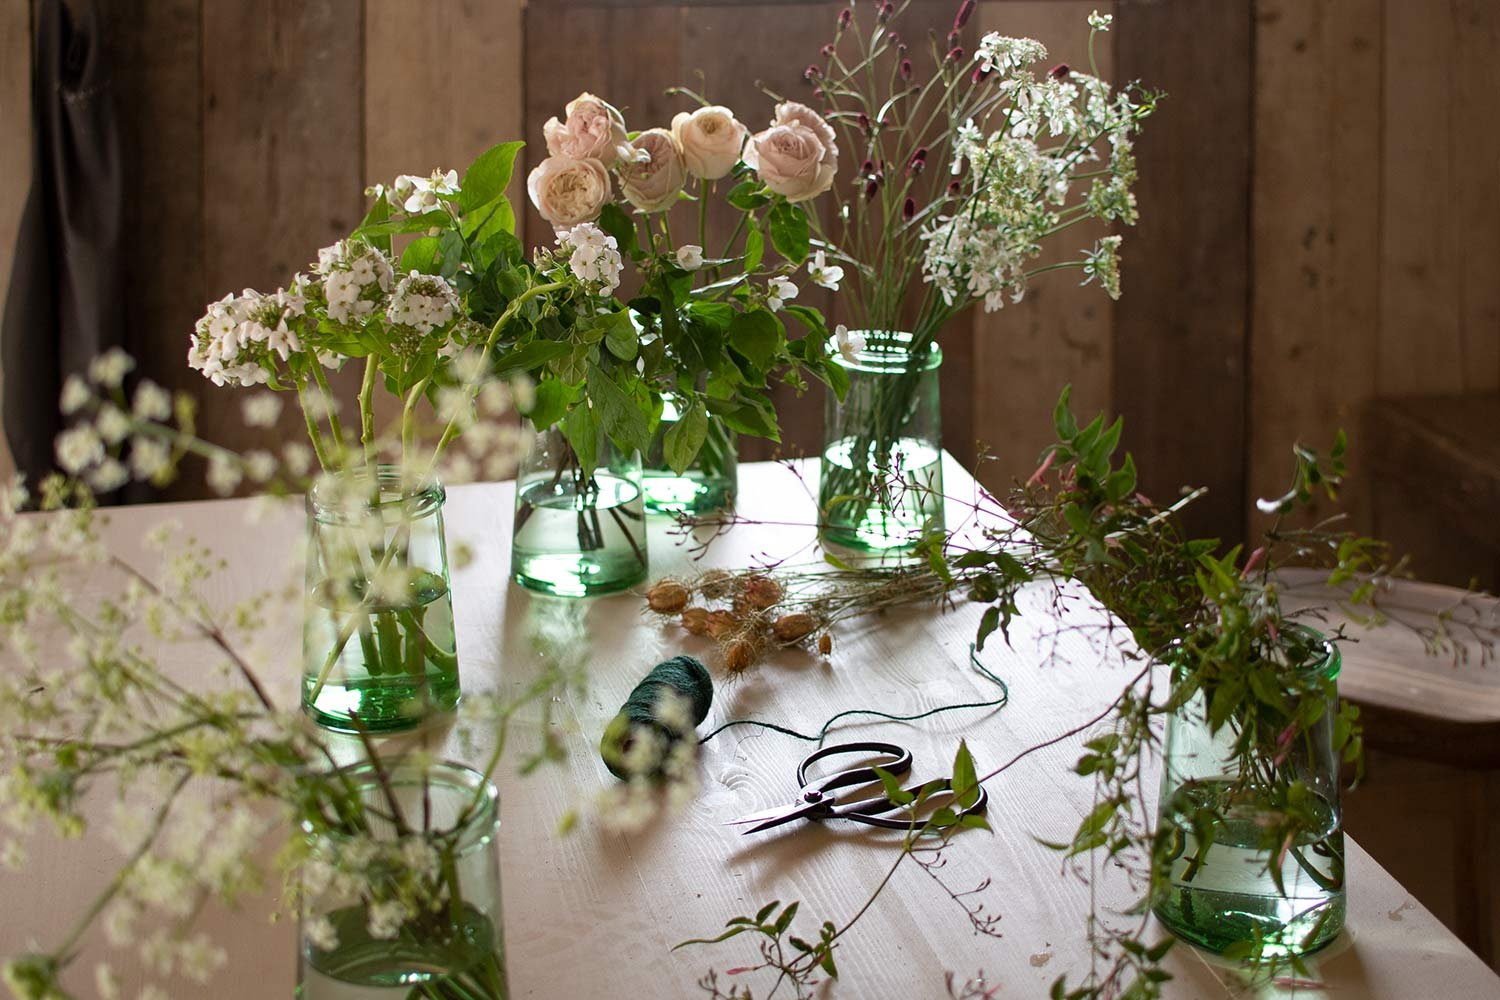
VESSEL
A large apothecary vase, made from clear glass. This vase measures H45cm x D38cm.
You will find a huge number of apothecary vase sources, from antiques markets through to huge suppliers online. Ideally look for recycled glass, and avoid the very thin vases (although a little less expensive, they can often break). This vase is from DutZ, one of my favourite European vase suppliers.
To help boost your flowers’ longevity, keep your vases spotlessly clean. A good rule of thumb: ensure your vases are as clean, as a glass you would happily drink from.

FLOWERS & FOLIAGE
Small seasonal branches (I used Birch within this design)
Viburnum
Delphiniums
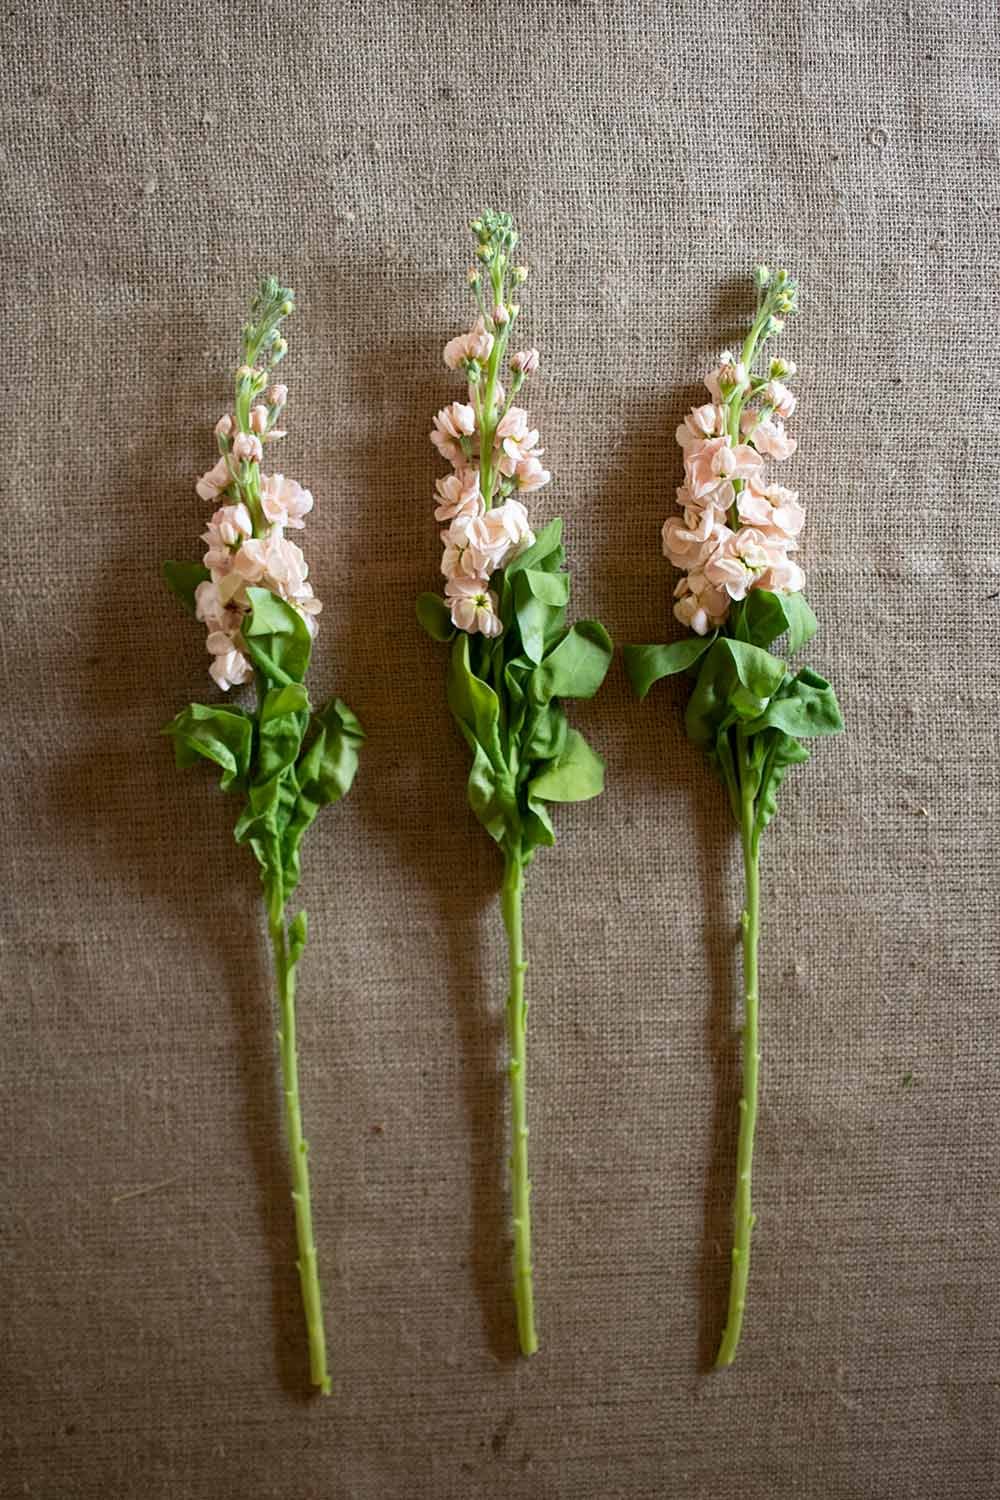
Stocks
Roses


CONDITIONING
Before you create your design, the following steps will help your flowers to fully rehydrate and rest, which will increase the longevity of your design:

REMOVE LOWER LEAVES
After picking or as soon as you receive your flowers from your grower/ wholesaler, remove lower leaves (any leaves that will sit below the water line in the vase).
Usually you can simply pull the leaves down and away from the stem. If they are a little tougher, simply use a sharp knife or floristry scissors for a clean cut.

CUT AT AN ANGLE
Using floristry scissors, cut 1-3cm from the bottom of the stem, on a strong angle. The angle increases the cut surface area and helps the stem to draw up more water. Plunge the freshly cut stems into fresh, tepid water and leave to rest for several hours.
N.B. If you are conditioning soft stems (most spring bulbs), cut straight across (not on an angle), as the point of the angle won’t support the weight of the flower.
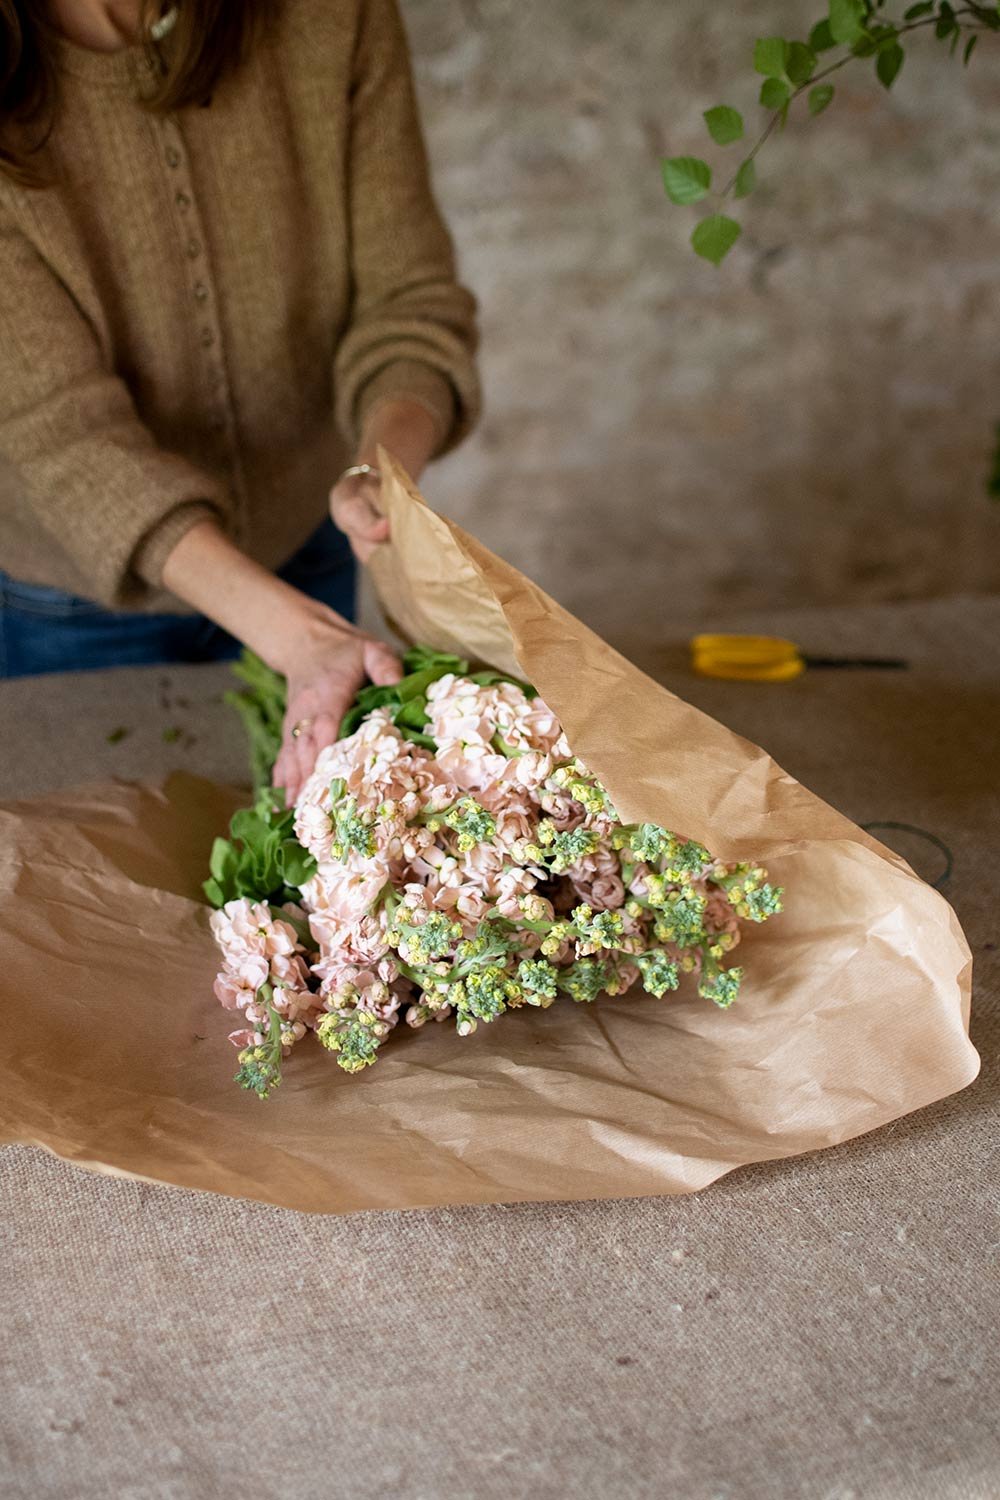
DEHYDRATED STEMS
If any of your stems are very dehydrated, soft and/or droopy, it’s best to straighten them before they fully rehydrate again. If you simply place them into water without first straightening, often their stems will become rigid, and remain in their drooped shape.
Using brown paper (recycled from a previously wrapped bunch), carefully bring your stems into a tight bunch and lay flat …

… tightly wrap the paper around the stems, being careful not to squash the flower heads and secure with garden twine. Whilst still wrapped, cut each stem at an angle and plunge into fresh, tepid water. Leave to rest for several hours.

LARGER BRANCHES
Either using floristry scissors or stronger secateurs, cut 2-5cm from the bottom of the branch, on a strong angle …
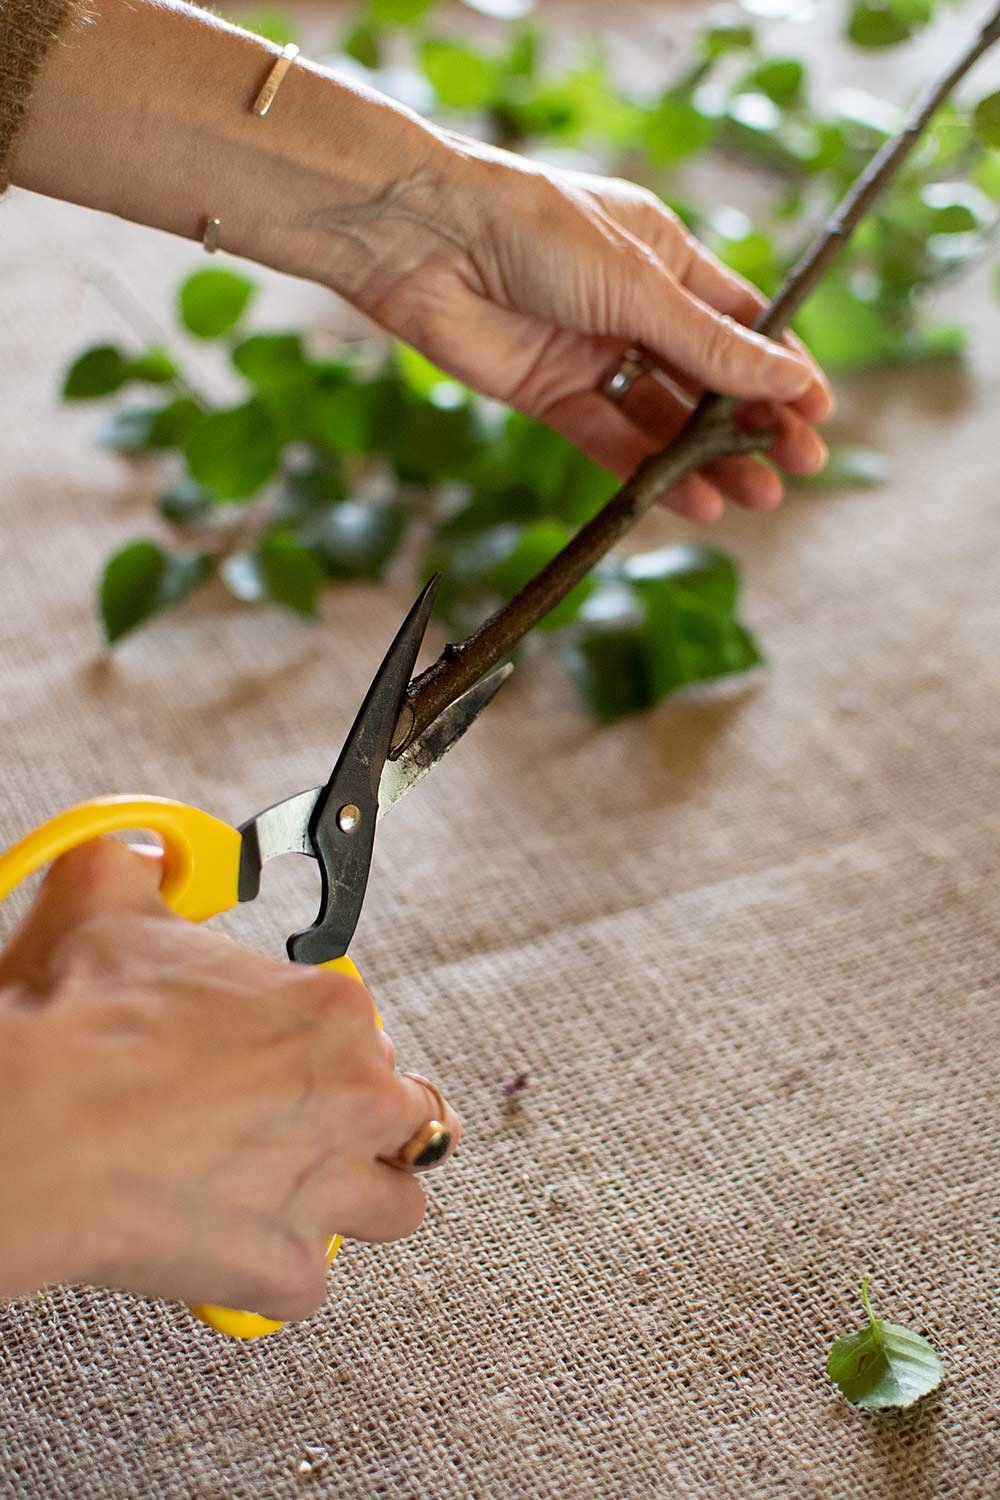
Next, add a secondary cut; this time vertically, up through the centre of the branch …

… to create an obvious split in the bottom of the branch. This extra cut further increases the surface area, helping these larger branches to draw up more water. You’ll find branches in leaf are very thirsty, and this step helps them enormously to remain hydrated and fresh.
CREATING THE DESIGN

1.SIZE OF DESIGN
This is very approximate, but a helpful guide - you are looking for the bulk of your design to be approximate the same height again as your vase, with a few longer stems of foliage, to create a natural, looser finish. I will often measure my first foliage stems against the vase, before I cut.

2. REMOVE lower leaves
Pull or snip away any lower lying leaves. You want to ensure the water in the vase is clear from any leaves, you simply want clean stems in the water. This helps to keep the water clean and slow down growth of bacteria in the water.

… I also often prefer to remove any leaves that lie below the rim/inside the vase, particularly when the neck of the vase is narrower.

3. INITIAL SHAPE
As with the height, the width is also crucial to achieve an overall balanced design. You are aiming for approximately double the width of the vase, again with a few longer stems of foliage, to create a natural, relaxed finish.

Continue adding a few more foliage branches. You want enough to achieve a good base shape, without completely filling the vase. I used approx. nine small branches/off cuts from larger branches.

4. NEXT STEMS
Next I added viburnum, distributed through the design. The stems were shorter than the branches, so I was careful not to add too many, and to ensure I kept the design feeling light.

I love the shape created just from the branches and viburnum; I often have a single large vase at home, filled with one or two simple ingredients like this.

7. FLOWERS
Next I added the delphiniums, distributed relatively evenly through the mixture of foliage and viburnum. I don’t place them symmetrically through the design so as to keep the design more natural and balanced.

8. SCAFFOLD OF STEMS
All the stems so far have been long, and as they have been placed into the vase, together they have created a scaffold of stems. You’ll find that this brilliantly helps to hold and support any shorter stems, ensuring they can still remain high and visible.
As long as the end of the stem sits below the waterline, they will be fine.

9. FOCAL FLOWERS
The roses are some of the shorter stems, and benefit from being held higher in the design, using the support from the stem scaffold. Simply place into the design and allow the existing stems to hold the stems in place.

If you find any of the shorter stems don’t quite sit below the water, you can easily top the vase up with a little more water.

As with the delphiniums, I placed the roses relatively evenly through the design, to create clear space and balance, but not so even that the design looks overly perfect, and unnatural.

10. Bridging flowers
The addition of the stocks helps to bridge the roses and the delphiniums. They offer a shape that sits between the slender, finely tapered delphiniums and the roundness of the roses and their gentle blush colour bridges the contrast between the apricot of the roses and creamy white of the delphiniums. The shape of the stocks brings a sense of harmony to the overall arrangement.

As with the roses, the stock stems are a little shorter, so benefit from being held high with the support of the stem scaffold.
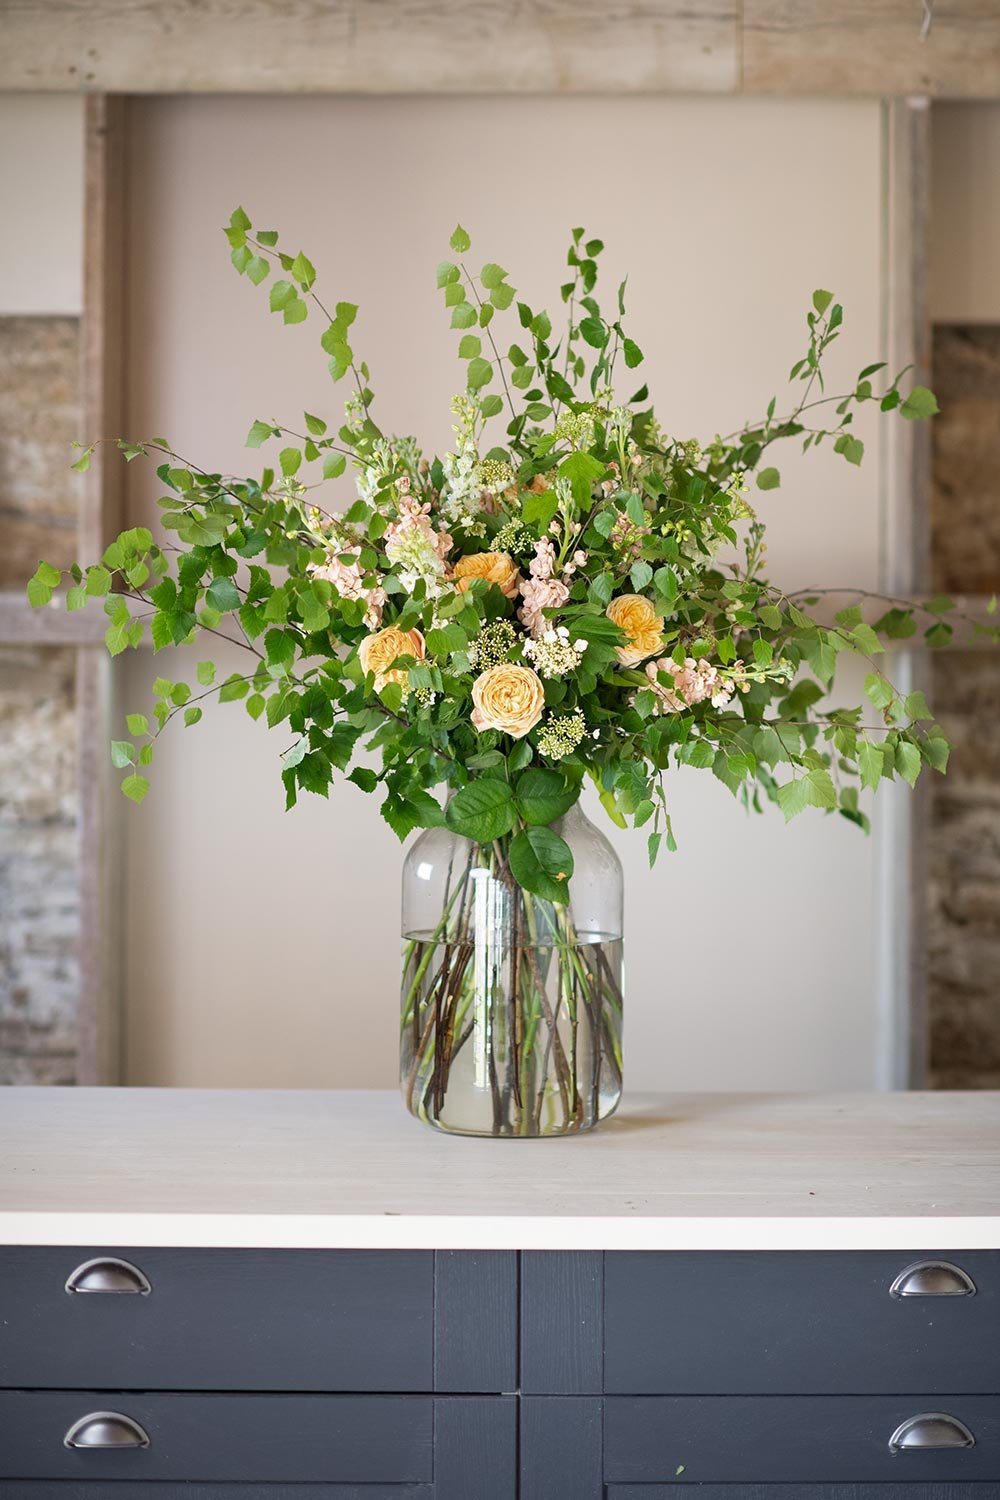
11. FINISHED DESIGN
As you are making the design, repeatedly stand back and view from all sides. You are looking for balance in height and width, and a good distribution of flowers, with their placements relatively evenly spaced apart, yet not overly considered, to ensure the design looks free and natural.
AFTERCARE
I recommend changing the water every two days. Simply lift the whole design out with both hands and place carefully down onto a table. Wash your vase thoroughly, remembering that you want it as clean as you would have a drinking glass. Fill back with fresh tepid water. Next rinse the bottom of the stems thoroughly, to remove any bacteria building up and place the design back into the vase again.
As long as you held the stems tightly, the design will have retained a good shape, it might just need a little attention to achieve a similar shape again.
To boost your stems longevity further, keep your design in a cool spot, away from a heat source, and out of direct sunlight.


FLORISTRY FUNDAMENTALS MASTERCLASS
SIGN UPS OPEN LATE MAY | WAITLIST NOW OPEN!
TURN YOUR LOVE OF FLOWERS INTO A LIFELONG SKILL & A POTENTIAL NEW CAREER
The Floristry Fundamentals Masterclass is an online course that happens just once a year and will give you everything you need to give you a thorough grounding in sustainable floristry.
Over five weeks you’ll master twelve essential sustainable flower designs - from hand ties to large vases to table arrangements.
You’ll feel fully confident in your own skills, and embrace and establish your own clear style.
Each design has been carefully chosen, to ensure you quickly and easily learn the core principles of design and have a strong and confident foundation to sustainable and seasonal floristry.
You’ll also understand how to:
Choose the best seasonal blooms and foliage.
How to care for and condition flowers.
The importance of texture, depth, scale, shape and colour.
Which tools, mechanics and the best vessels to invest in.
Ideas from where to source flowers
How to work out how many stems are needed for a design
And how to perfect sustainable techniques.
MORE IN THE JOURNAL

ELEVATING CLASSIC STRUCTURES

HOW TO BOOST HELLEBORE LONGEVITY
CARE GUIDE & EXPERT TIPE