HOW TO CREATE BUTTONHOLES
A COMPLETE STEP-BY-STEP GUIDE TO CREATE NON-WIRED BUTTONHOLES/boutonnieres
introduction
A few days ago, I asked on Instagram, what are the designs you would most love a step-by-step for … and buttonholes/boutonnieres were one of the most requested designs, specifically non wired styles.
I love the finish and more natural design of a non wired buttonhole - stepping away from the classic, slightly more rigid finish, where the wires replace the flower stems - a beautiful, unique mini design, that is perfect for all types of weddings.
I have created a complete step-by-step guide, that's easy to follow, featuring three different styled, non-wired buttonholes. Each one takes you through the making, from beginning to end, to help you feel confident and to really enjoy creating your own miniature designs.
Follow the guide, simply choose your favourite stems and embrace your own style … and as always, I love seeing your work - please share on Instagram @philippacraddock.

RELAXED BUTTONHOLE
The stems are left in place.
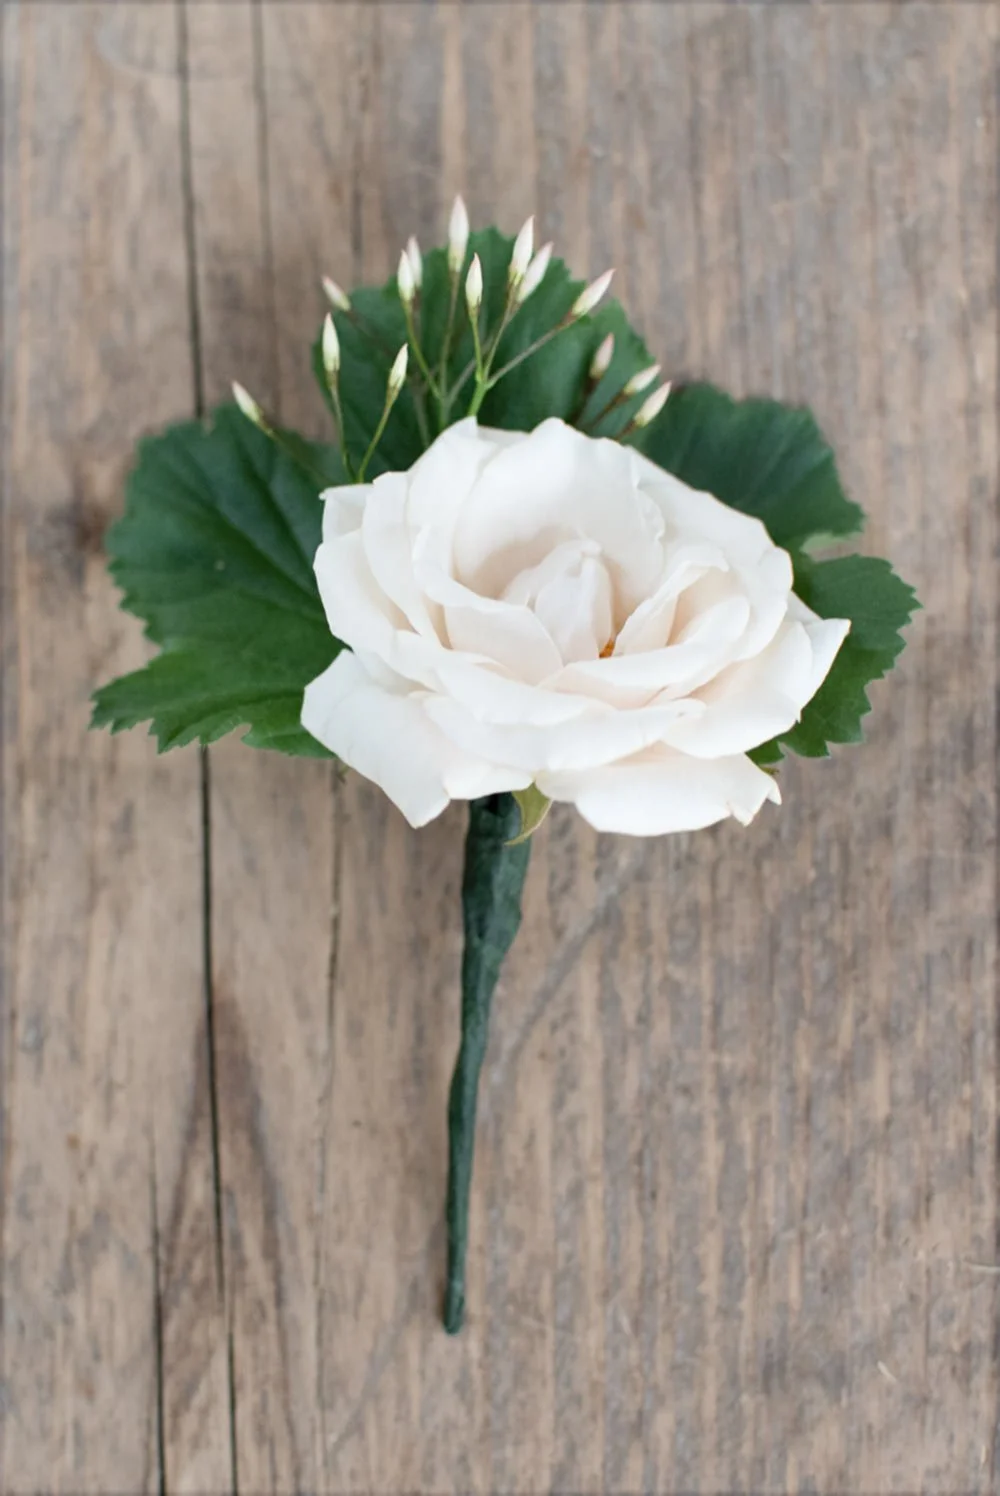
CLASSIC WIRED BUTTONHOLE
The wire and tape replaces the stems.
wired vs non-wired & LONGEVITY
There are a few positives of a wired buttonhole - the wired “stem” is stronger and cleaner, and it’s easier to attach to a lapel (using either a safety pin, or a classic pin - particularly if the wired end is placed through a lapel hole). And because the stem ends are taped and therefore sealed, the flowers and greenery are likely to retain a little more moisture and therefore the design will last a little longer, an important factor particularly in the warmer months.
There are though also positives of a non-wired buttonhole - as the stems are still attached and open, the design can remain in water right up until it is placed on the wearer, so it is fresher from the get-go.
As with any bridal flowers out of water, it’s really important that you are realistic and that you manage your clients’ expectations - unless you opt for very hardy flowers, these designs will only last a few hours, after which they will begin to wither (particularly if it is a warm day). Sometimes I will create two collections of buttonholes for our clients, one for the ceremony and a second for the photographs, to ensure the buttonholes look fresh and perfect for both key parts of the day.


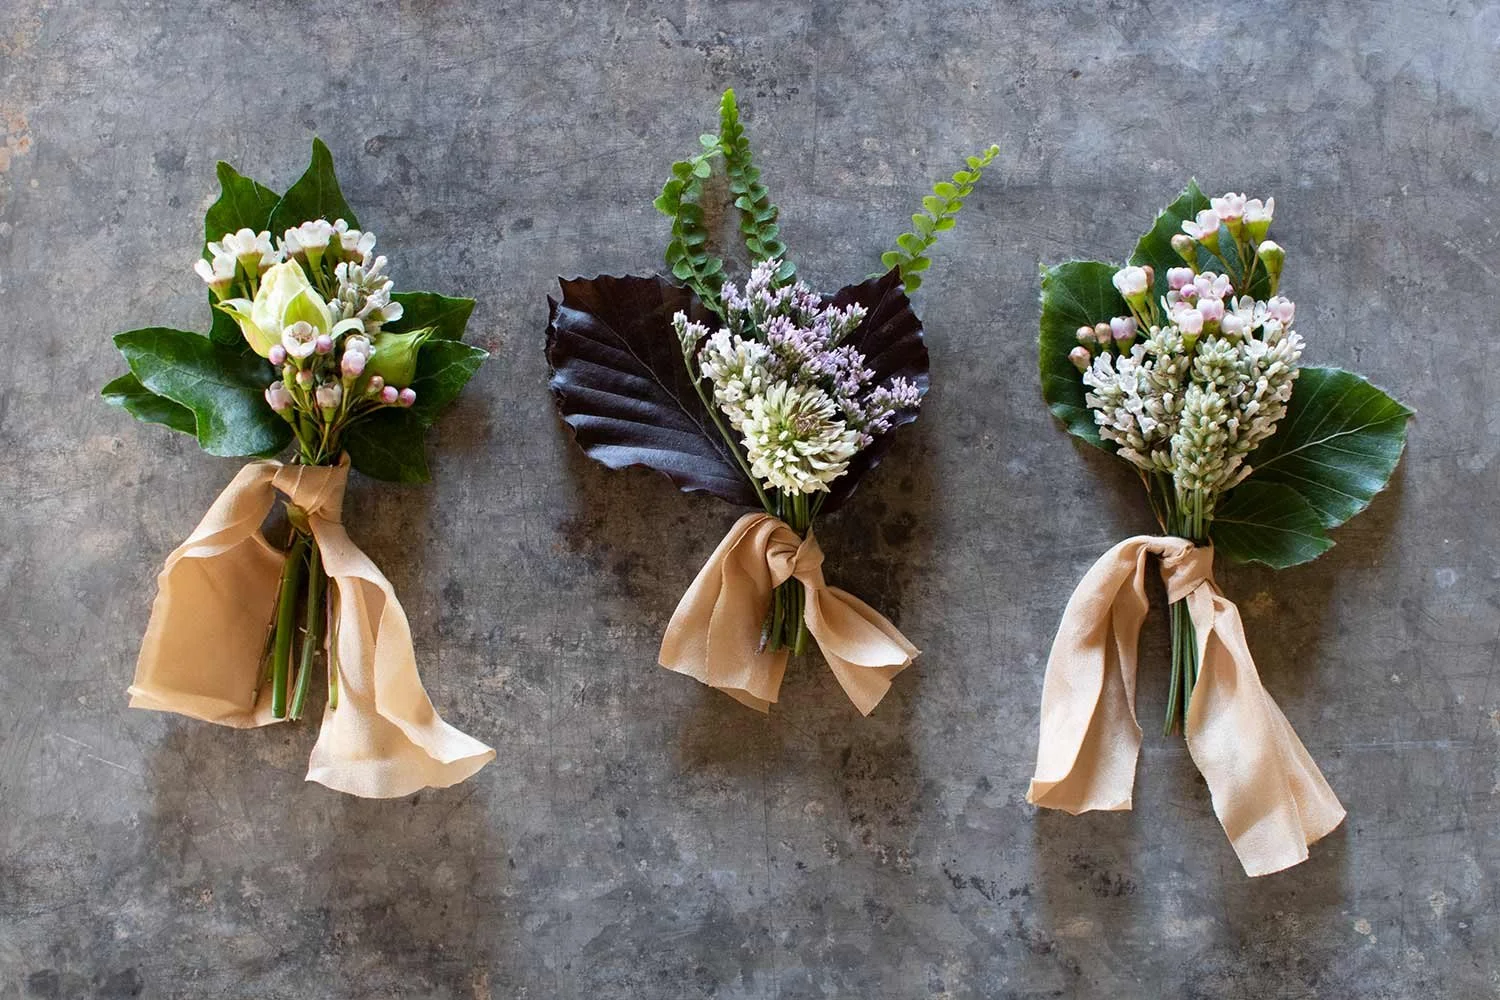
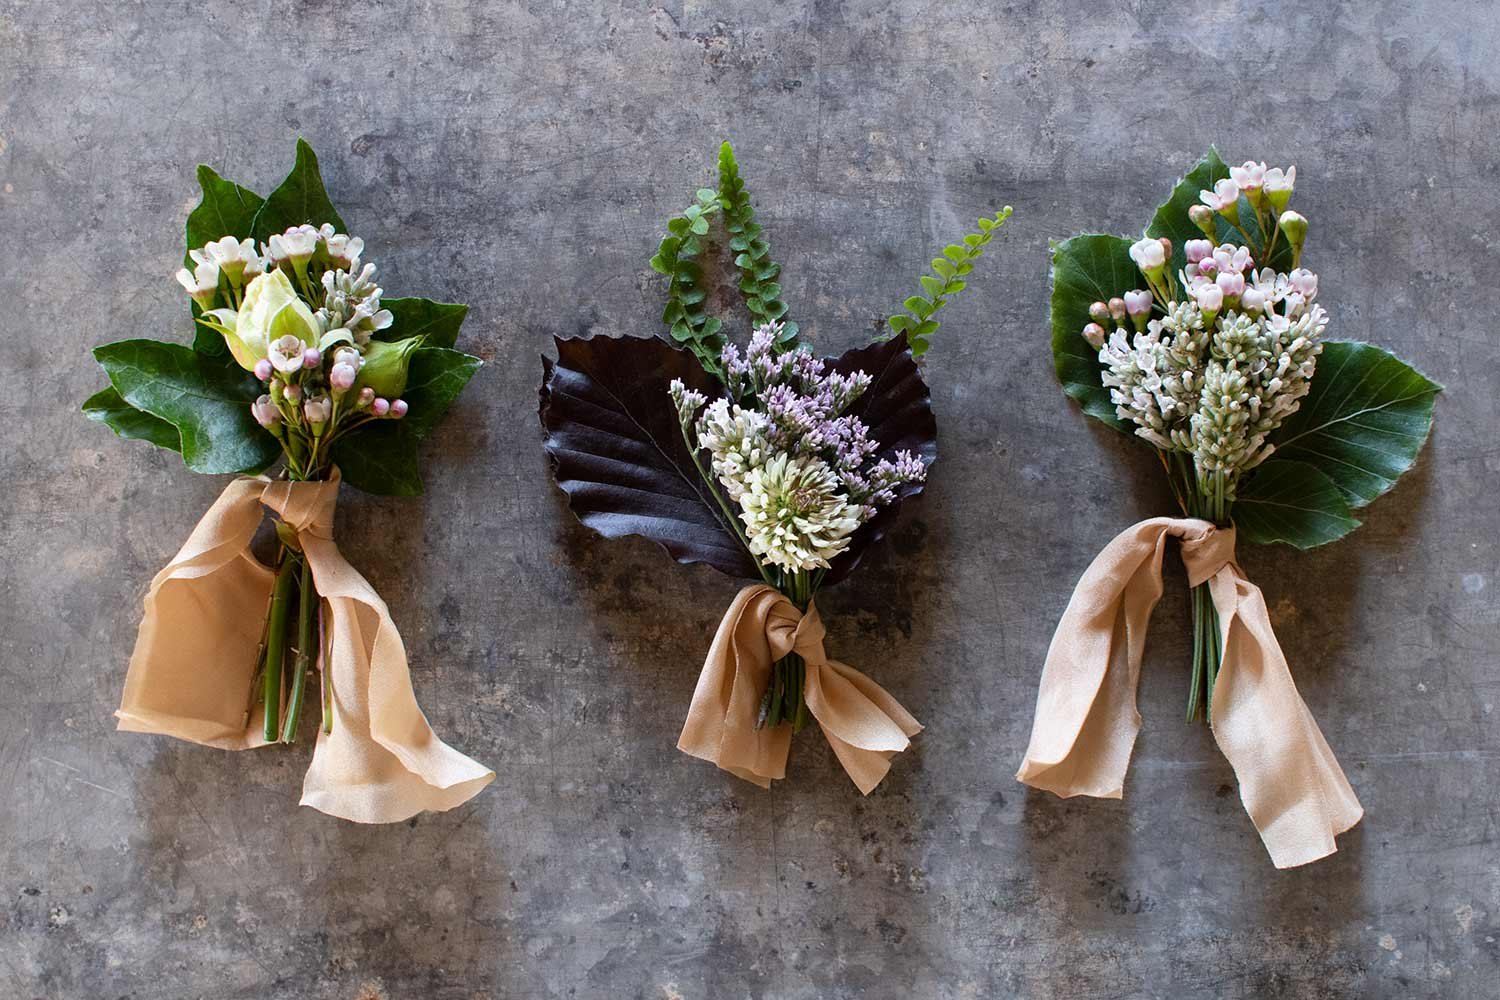
FIRST DESIGN STEP-BY-STEP
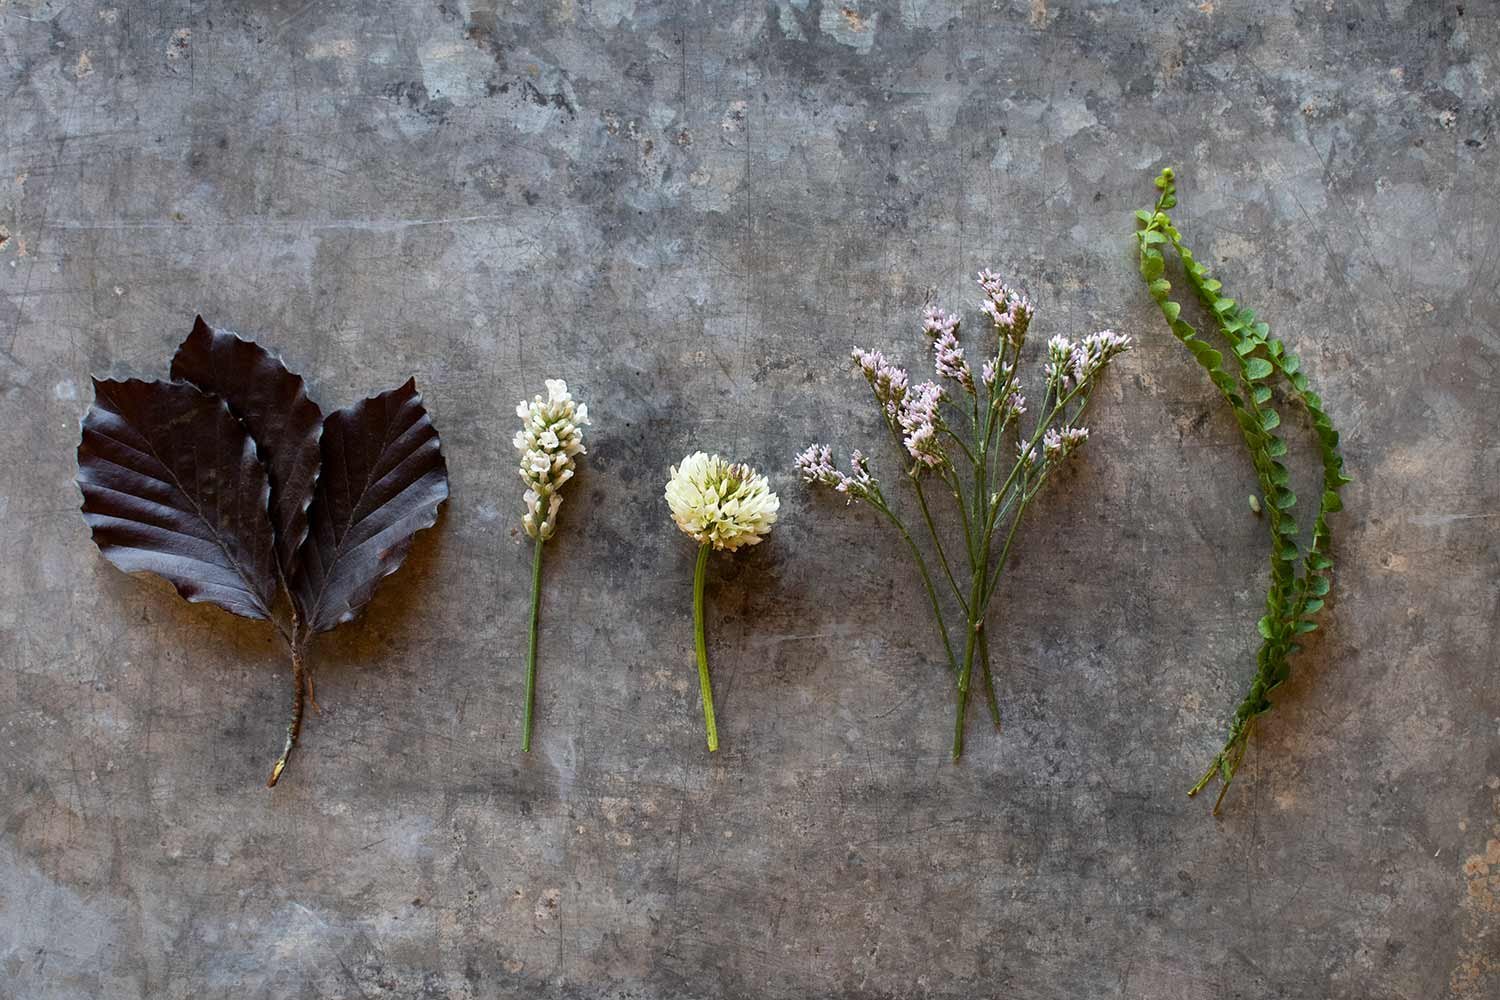
COPPER BEECH
LIMONIUM
HARDY CLOVERS
LAVENDER
FERN FRONDS
SECURED WITH GARDEN TWINE
STEP ONE
SELECT HARDY INGREDIENTS - It is best to test what does and doesn’t last well out of water a few days before you make the buttonholes. Often the hardiness (how long each stem will remain rigid and fresh-looking whilst out of water) will change, depending on when the variety is in the season.

STEP TWO
START WITH YOUR BASE STEM - often this will be a larger leaf or a few leaves. This creates a base platform, offering both visual and actual support for the next stems. Hold it in your less dominant hand (I’m right handed, so I’m holding it in my left hand).

STEP THREE
NEXT STEM - add larger/wider stems first, to create a beautiful mid layer. It’s great if you can select contrasting tones, to easily depict each ingredient.

STEP FOUR
DEPTH & TEXTURE - create a sense of depth and texture to this mid layer, by adding multiple small stems.

STEP FIVE
FOCAL FLOWERS - add one to three key focal flowers, these are the stems that will be most noticeable within the design, and are framed by the backdrop and mid layers.

STEP SIX
EXTRA DETAIL - you may decide to add extra detail and a sense of movement to the design with a few extra longer stems, these can be small elongated flowers or greenery, placed at the back of the design.

STEP SEVEN
FLAT BACK - as you are adding additional stems, ensure the back of the design remains flat, so it sits neatly on the wearer’s lapel.

STEP EIGHT
SECURING - using either garden twine or paper covered wired, cut a small length (approx. 15cm) and place over the front of the bind point. The bind point sits just below the flower heads.

STEP NINE
BIND ROUND - carefully bind the stems securely. N.B. garden twine is good to use as it means the entire design can be completely compostable at the end of it’s life, using paper covered wire though makes the design a little more secure and is easier to use.

STEP TEN
KEEP IT NEAT - as you are securing the garden twine or paper covered wire around the bind point.

STEP ELEVEN
TIE OFF - tie with a double knot at the back of the design. If using paper covered wire, simply twist to secure and cut the twine/wire ends short.

STEP TWELVE
STEM ENDS - cut straight across, either have the ends short, or keep them longer, this is entirely based on your style preference. Here I have cut them short.

STEP THIRTEEN
RIBBON - you can either leave the bind point plain, with the neat twine/wire on display or finish with a small length of ribbon (approx. 20cm long).

STEP FOURTEEN
NEAT FINISH - I often use a wider ribbon (5cm width) and finish the ribbon with a simply double knot, rather than adding a bow. You can though of course use a thinner ribbon and finish with a neat bow.

STEP FIFTEEN
CUT RIBBON LENGTHS - cut a neat end to the ribbons (and make sure you iron your ribbon, unless you want to have a slight crumpled effect as shown here!).

FINISHED DESIGN
Once finished, place the design into a small glass of shallow water, keeping the ribbon carefully out of the water, and place in a cool spot, away from direct sunlight. It is best to make on the day the buttonhole will be worn, but if it is cool and time is tight, you can make it the afternoon/evening before.
SECOND DESIGN STEP-BY-STEP
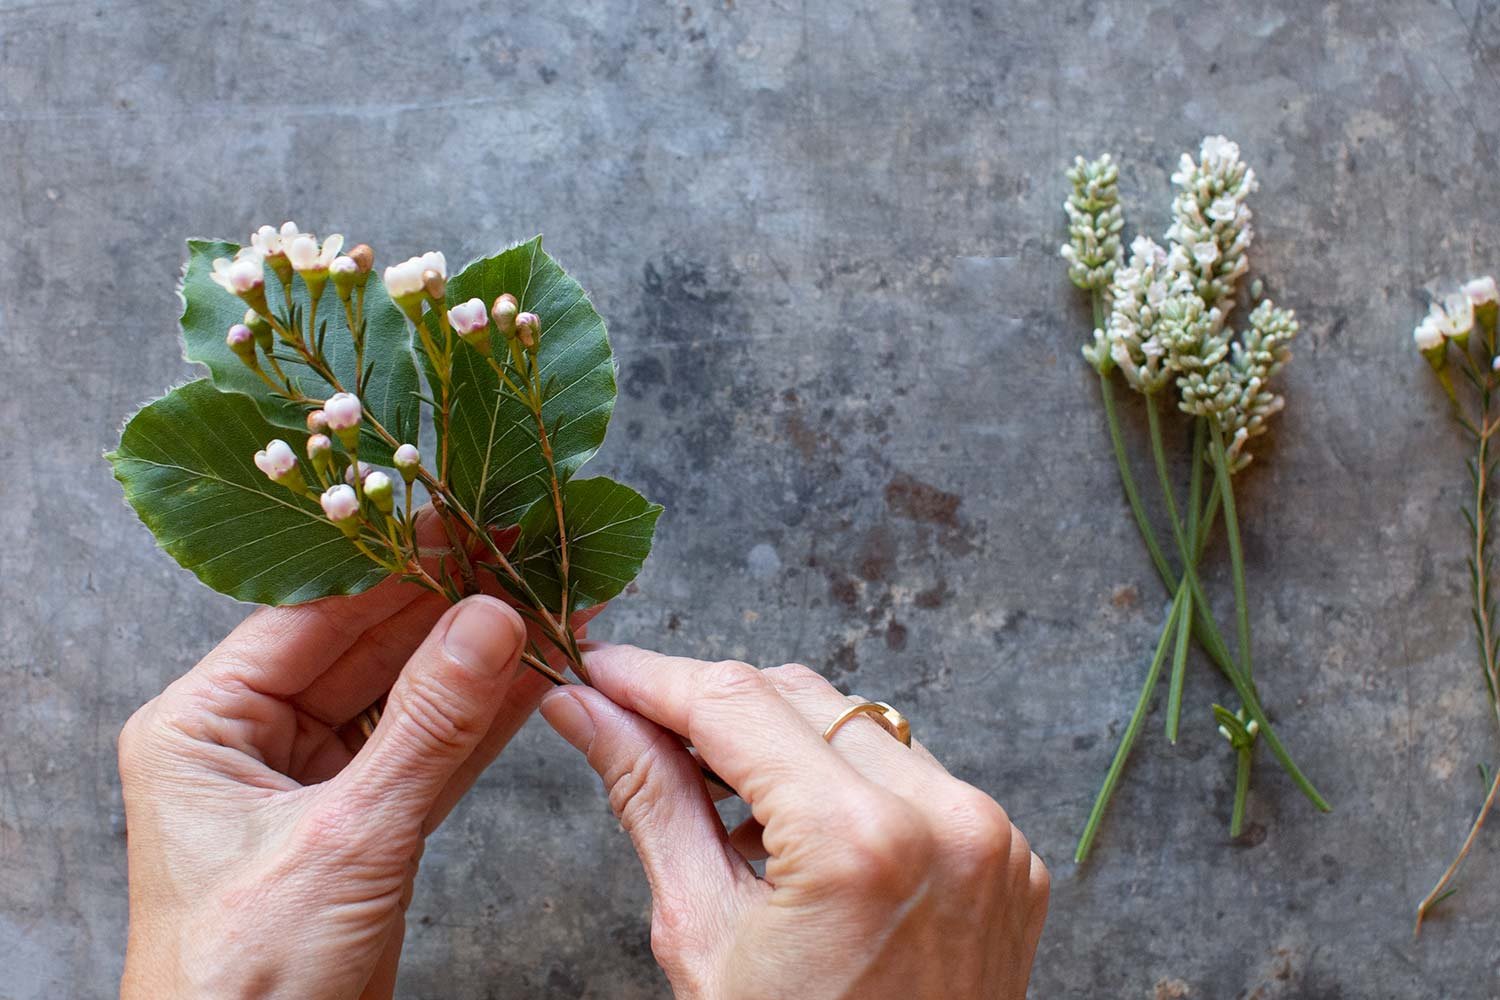
BEECH
WAX FLOWER
LAVENDER
SECURED WITH PAPER COVERED WIRE

STEP ONE

STEP TWO
STEP THREE

STEP FOUR

STEP FIVE

STEP SIX

STEP SEVEN

FINISHED DESIGN
THIRD DESIGN STEP-BY-STEP
IVY LEAVES
WAX FLOWERS
LAVENDER
SPRAY ROSE BUDS
SECURED WITH PAPER COVERED WIRE

STEP ONE

STEP TWO

STEP THREE

STEP FOUR

STEP FIVE

STEP SIX

STEP SEVEN

SETEP EIGHT

STEP NINE

STEP TEN

STEP ELEVEN

STEP TWELVE

FINISHED DESIGN
HOW TO CARE FOR YOUR BUTTONHOLES
Once finished, place the design into a small glass of shallow water, keeping the ribbon carefully out of the water, and place in a cool spot, away from direct sunlight. It is best to make on the day the buttonhole will be worn, but if it is cool and time is tight, you can make it the afternoon/evening before.